Are dobsonian telescopes good for viewing planets?

Are dobsonian telescopes good for viewing planets

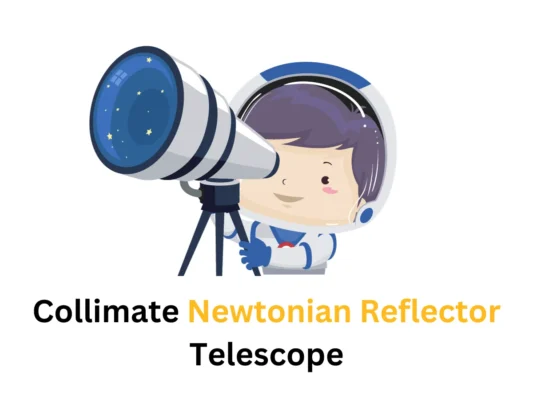
The Dobsonian-mounted Newtonian is a simple push to altaz mount for visual observing. However, using the reflector as an imaging device will allow you to take images of both solar system objects and deep sky targets with RegiStax or Autostakkert.

The Dobsonian design is simple. It’s a pure reflector without any issues with color distortion or ghosting, and the obstruction in its center tends to be smaller than other types of mirrors such as Schmidt-Cass.

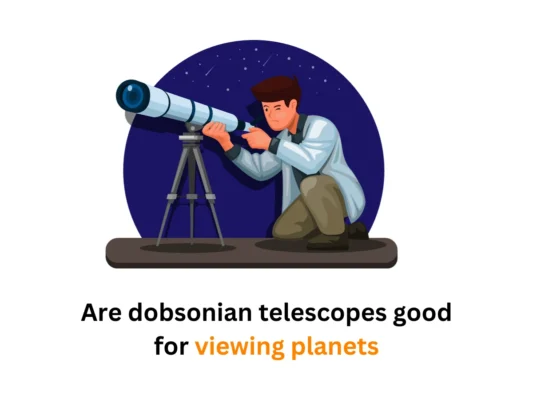
but the question arises is that  Are dobsonian telescopes good for viewing planets?

To capture videos of moving objects, such as planets and stars that pass between us and the Earth’s camera lens every night, we must use a method called drifting.This can be accomplished with no driven mount by capturing multiple short video sequences while following it through space at 15 arc seconds per second – about 1/10th speed in relation to earth’s rotation which means our planet will drift along for 30 minutes before coming back around again.

In order not have any smearing from drifts when stacking images together after they’ve been taken during even longer exposures (upwards towards 3 hours!), you’ll need faster.

There are few windows that allow for videos to be recorded, but it’s also limited by the amount of rotation smearing.

how long you can image the planets:

Venus – No real limit.

Mars-Five minutes.

Jupiter- Five Minutes.

Saturn Ten Minutes.

A Barlow lens is used to enlarge the planet’s image. The magnification you can get with one will depend on many factors, including how high or low their focal distance are from where it needs be focused. If they aren’t in focus at all then only part of what’s being observed through your scope will end up enlarged which means lower detail when viewing stars next door compared with extremely close objects like Jupiter for example – don’t forget about using an impactor if possible.

Achieving an effective focus is not easy with the drift method, as it’s difficult to predict where a planet will be in your frame. You could benefit from using a camera that has more pixels and takes advantage of its bigger chip size so you can capture higher percentage shots

Although getting photos without much focusing error isn’t impossible by any means–you just need some luck! The driver-driven approach really lets me pull out all those pesky little details though; even when I don’t quite catch them dead center on first try or two.

Imagine if you could get rid of all that pesky distortion. You’d be able to zoom in on an object with fantastic clarity!.With a driven scope, this isn’t just possible – it’s reality thanks to the innovation and engineering behind our lenses which are designed for better image scaling at higher magnifications without sacrificing resolution or field stops ( magnification).

Gathering more frames will reduce noise in any given photo since they don’t need be repeated when moving from start point if Go To system is fitted for Dobsonians who are push-to scopes anyway – how do these work? One way would involve fitting their own equatorial platform onto it or placing camera on an existing one that’s been adapted with specific equipment necessary such as computerized mounts etcetera.

Are dobsonian telescopes good for viewing planets

For deep sky photos, neither long exposure nor planetary imaging is probably enough. But because of the frame-to-frame alignment capability in stacking programs like Registax 6 and Photoshop CS5+, both types can produce good quality end results with just one photo!

The Go-To mount will allow you to quickly find your target and record videos of the planet in motion. The best part about this is that it should compensate for any inaccuracies with its own motors, so all we need do now is keep an eye on what’s going down.

When you are deep-sky imaging, it is much easier to avoid any problems with planet rotation. However if combining videos of different length then the field rotation could become noticeable over 10 or 20 minutes depending on how quickly your camera moves relative to stars in an open sky setting like outer space where there isn’t as much light pollution from city lights back home near Earth’s surface.

Capturing images with the drift method:

To reduce thermal currents in the scope, set it up and allow to cool. Then collimate as normal with these steps: connect a digital video camera into your telescope so that you can see what’s happening through both eyes or just one; focus critically on Polaris while looking at laptop screen which will not move during focusing process because of how close we are able view through this type instrumentation.

With a finder scope, align on Polaris and check that you have chosen an exposure settings for when it is in the middle of your frame. The brightness should be about 70 to 80 per cent saturation level with 50-75 gain maximum.

To record an image of the night sky, begin by positioning your scope so that you can view both its cross wires-the little lines in front of which are called finders. Now place this near where you plan on capturing footage; make sure they’re focused along with one another (not at different levels). When there’s no light pollution around to obscure what should be visible through them then hit record ! Once everything looks good go ahead and start recording – focus on anything from stars and planets down to satellites.

Join your videos together using PIPP’s ‘Join’ mode. With the Object Detection and Centre functions, you can keep everything in frame while eliminating empty frames. Process this output video with RegiStax or Autostakkert to finish it off beautifully for YouTube consumption (or whatever media device.

The equatorial approach of telescope:

Mounting your Dobsonian on an equatorial platform is the second option and gives you true, Permanent Equatorial Movement. The mount maintains low center of gravity like GoTo Drive Method but as soon as find target it stays put in field even if turned off or disconnected from controller so scope remains aligned with night sky’s rotation.

A commercial equatorial platform can be used to turn your DSLR into a fully tracked camera. These are available from many different suppliers and generally range in latitudes, but for planetary imaging it is important that the drive system has absolute accuracy so there isn’t any parallax error during shots taken at varying angles on one subject.

One of the most important characteristics of a telescope drive system, if you want to achieve full high-resolution images is that vibration should have no affect on your viewing experience.

Are dobsonian telescopes good for viewing planets? The quest for perfect imaging means looking out for any signs or vibrations which could cause distortion and blurriness in an otherwise crystal clear image. While equatorial platforms often use stepper motors as their main drives there’s always danger they’ll produce unwanted side effects like bashing against rock fixtures while moving across uneven terrain–this can lead not only towards blurry photographs but also headaches from constant motion discomfort.

Vibration will cause the smooth path to start resembling a saw-tooth.

The equatorial platform is one of the more confusing types, but it’s nothing compared to some other mounts. It has an obvious rotation axis and doesn’t need any special care like regular trackers do.

You can check reviews of telescopes here

Conclusion:

The Dobsonian-mounted Newtonian is a great telescope for visual observing. But, if you want to take images of solar system objects or deep sky targets with RegiStax or Autostakkert (or other software), the reflector can be used as an imaging device too! If this sounds like something that interests you, check out our page on how to choose your  first telescope and let us know what questions need answered about telescopes in general by contacting one of our experts today.

How to clean scratched Schmidt Cassegrains Telescope

How to clean scratched Schmidt Cassegrains Telescope

How to clean scratched Schmidt Cassegrains Telescope When these instruments get scratched up, it can be difficult to use them because of how critical the lenses are when capturing images. There are a few ways you can clean your telescope without damaging it any further or causing other problems with how you see through it.

Ways to clean scratched Schmidt Cassegrains Telescope

The glass corrector plate on an SCT can become dusty and appear to require cleaning. It is a delicate piece of optical glass with multicoating that you want be very careful about touching or wiping, as it may scratch the coatings. There’s general agreement among professionals not to clean unless absolutely necessary because doing so could result in smudges being transferred from one part of the scope into another- potentially harming its transmissivity (efficiency).

If you live in a humid climate, it’s important to clean your corrector plate (and eyepieces) often because dust will cause dew buildup. If there are too many condensation sites on the surface for this type of mistral condition-which is what we have here with me today-, then observing can become extremely difficult due sloppy optics and shaky hands; your eyesight may even start suffering if mistakes get made during an observation session where objects seem blurry at times.

Before you clean your telescope, make sure that the lens is dust free and remove all residue. You will need a camel-hair brush to do this as well as one from any good department store selling women’s cosmetics for makeup application purposes only! Once everything has been cleaned thoroughly inside of it, simply use some alcohol wipes on both exterior surfaces (the outside) until they shine like new again – or bin them if their condition isn’t up-to snuff just yet

Alternatively, you can remove dust using a can of “compressed air”. Now there is some disagreement about this because many people have experienced leaking and dropping the liquid onto their correctors when using them with an umbrella-style compressed duster like what I use which holds only CO2 gas instead of other forms.

Such as pressurized oil or hairspray coming out into contact with delicate glass surfaces near optics where dirt accumulates quickly without dusty conditions anywhere else nearby too much potential airborne particulate matter floating around outside either way most importantly don’t forget to wear gloves.

Also read interesting content on Schmidt

A second choice is Radio Shack’s “Velocity.” The X-tremeGeek system uses compressed carbon dioxide cartridges with no propellant or additives at all, and the RadioShack version will not have any of those anti static agents which can be dangerous if they come into contact with your optics.

Jay Faircloth an experienced scope user has written instructions on how to use a canned air for cleaning – click here download his excellent text file containing these exact steps.

Third, if you decide to use a liquid cleaner (more on that below) the best tissue with your cleaning solution is Kleenex brand unscented tissues – these are softer and less likely to scratch glass than other types.

Even KimWipes can be abrasive for those who have sensitive eyes so opt instead for more gentle options such as bath tissue or even pure cotton handkerchiefs which tend not only has no scent but also absorb very little moisture from their wearer’s breathe making them perfect when it comes time wipe off any excess mist after application of moisturizer/make up remover combo!

Also read helpful content on Cassegrain 

Cleaning the corrector

The purveyors of high-quality optics recommend a solution containing 60% isopropyl alcohol and 40% distilled water to which one or two drops liquid dish soap may be added. Meade’s instructions are similar, but they require that you mix 3/4ths (90%) with 2 1/2 cup each – enough for about three full washings at least.

I hear that plain Windex works well as a glass cleaner. This is true for those who work with optical glasses professionally, and I’m not making this up! The only thing you should note when using different brands of cleaners on your corrective lenses (other than the recommended ones) would be their potential to damage antireflection coatings if too strong or leave behind residues like other cheaper products may do.

clean scratched Schmidt Cassegrains Telescope

Use compressed air to clean out large particles and dirt

Canned compressed gas like Dust-Off contains a variety of compounds that can damage and even eliminate optical quality. The best way to use it (and avoid any scratches) is by following these guidelines:

1) Never shake the can before using, as this will cause both dust particles in your line or optics as well as deposits atop them; always vent away from sensitive equipment with at least 15 feet between you and any such area for safety’s sake

(This should go without saying but we recommend proper ventilation anyway just because humans tend not work quite right when working too closely together).

2a ) For those times where one must proceed quickly – remember never point directly down into an open flame.) b Patience during cleanup process secondarily depends.

 Use  cleaning solution to gently lift off any remaining dirt or smudges

If you want to clean your optics, the best solution is alcohol. Alcohol evaporates easily and does not cause problems with lacquers or non-metallic parts but it’s important for removing any adhesive residue from optical cement if used in telescope making because of its high affinity towards plastic surfaces like lenses where solvents such as water can dissolve metal components more quickly than they would on other materials such as wood frames which do have some hydrophilic properties along their grain boundaries.

so while we don’t really recommend using them on every occasion these types might work better when handling fragile looking stuffs.The alcohol can be used straight or you could add one or two drops of clear liquid dish-type soap (non-waxy) per quart to help lift off dirt and finger oils. However, too much will leave visible residues on your optics.

Use the solution to wet soft, plain tissue or cotton balls for larger optical surfaces

When cleaning your eyepieces, use the swab and wipe with little to no downward pressure in straight strokes across the surface while rotating. Repeat as needed until all visible oils are removed from any filters or lenses that have them on it; then finally shake off excess fluid onto another flat surface before storing away so you don’t contaminate other parts inside of their housing unit too much.

For mirrors used for viewing through optical instruments where there isn’t really anything else pressing against its face .Cleaning your optics is just as important for SchmidtCassegrain telescopes, but the process varies. Clean any minor spot with a swab/ball tissue mixture first to avoid scratching or damaging any surfaces that may be sensitive.

To clean lenses of smaller diameter in Refractor equipment use radial strokes from secondary mirror outwards while cleaning; repeat on both sides until satisfied with result before blowing off excess fluid gently using an air duster (or brush if available). Be mindful not only do we recommend gentle wiping along edges where there might’ve been contact between fingers during handling etc.,but also always make sure you wipe towards yourself rather than away.

You can check reviews of telescopes here


Dobsonian vs Cassegrain | Best Telescopes Guide

Dobsonian vs Cassegrain

There are a few important things to consider when purchasing your first telescope. A lot of people seem convinced by the idea that “you get what you pay for,” but this couldn’t be further from the truth in astronomy-quality products! You needn’t worry about getting something expensive or low quality because there is so much variety on today’s market – some good options start as little as $100 and go all way up to several thousand dollars+. It also helps if you know how different types of telescopes work before buying one: Dobsonian vs Cassegrain

There are two main types of reflectors: Dobsonian vs Cassegrain. A beginner would probably benefit more from the cheaper, simpler design that comes with a Dobsonian telescope as they can be had for cheap but if you’re looking to invest your money into something better-quality then there is no wrong choice between these different variations on reflecting telescopes; what matters most really depends upon personal preference!

Dobsonian vs Cassegrain

The design of a telescope is one of the most important factors when deciding which kind to buy. There are two main types, reflecting telescopes and refracting ones- each with its own unique properties that you should consider before making your purchase decision!

Refractor Reflector The differences between these styles can be summarized by saying reflectors use mirrors while refractors rely on lenses or other optical devices within their construction so let’s have look at how they work individually in more detail then compare them side-by

Dobsonian Telescopes

The Dobsonian telescope is the most popular scope for amateurs and beginners because of its affordability, which makes it a great choice even if you’re not an overly wealthy individual. The low cost means that anyone can afford one without feeling like they wasted their money on something too pricey or extravagant-it will fit right in with your budget!

The Dobsonian telescope is named after its inventor, John Dobson. He would say that he didn’t invent them but was the first to put all of these parts together – before him many reflector telescopes were out-of-reach for most men due mainly because they are expensive or difficult pieces of machinery. But with his invention came an inexpensive way into astronomy where amateurs could also use professional quality equipment without having too much money at hand!

Dobson was known for running his San Francisco Sidewalk Astronomy Club, which he started to try and encourage others into an interest in astronomy. There are some main aspects that really made a Dobsonian what it is; its unique design makes the use of this type of telescope practical even when observing from locations without clear skies like cities or busy highways because they collect more light than traditional reflector models do by spreading their optics out over greater distances on either side instead of having them all centered towards one point–this not only provides better resolution but also strengthens contrast between objects viewed through these types more evenly distributed systems

Altazimuth mount

The Dobsonian telescope can trace its roots back hundreds of years when astronomers first realized that the Earth rotates. It’s an altazimuth mount- instead of using altitude or Azimuth circles like other types do to keep it steady in one direction, you rotate both axes simultaneously which helps your view stay level with where ever sky objects happen too be located at any given moment

The main aspect about being a Dobsonian is their use of eh classic “Dobsonian” type mounts namely because they allow easy rotation either vertically &horizontally so as long you know what

Thinner mirrors

The mirrors used in older reflector telescopes were thick and expensive to make, but Dobson found a way around that by using less costly mounts. He was able to create thinner mirrors for his instruments inside the telescope itself.

Paper tubes

Another thing that made the Dobson Reflector more accessible for people of all walks of life was by using paper tubes instead. Although it may not sound strong, this is because Sonotubes are used in place of fiberglass or aluminum meaning they can hold heavy cement with ease!

Don’t let the name fool you, this old wooden telescope is much more than just an accessory to your backyard party Marquee. The Dobsonian has helped countless people see stars in their own backyards and given them access into astronomy that would have never been possible before its invention!

A Dobsonian telescope is the most common type of reflecting telescope because it’s one of the cheaper options on today’s market, and can be used by beginners all across America. A Newtonian reflects light into your eye to form an image that you’ll see through this small tube known as “the eyepiece.”

Cassegrain Telescopes

The Cassegrain telescope is one of the most popular instruments for amateur astronomers and professional observatories alike. Its small size makes it easy to use, while its ability to be compact has made this type of reflector system an excellent choice among many astronomers in both fields!

A Cassegrain telescope is a simple and effective design that has been used for many years. The unique feature of this type of reflector makes it perfect for use on lunar exploration missions, where size matters more than anything else in order not to exceed NASA’s astronaut weight limit back then!

Since Cassegrain telescopes don’t have a mirror, they are much heavier and bulkier than refracting or reflecting types. The primary advantage is that it allows you to make longer focal lengths with smaller aperture sizes because the light enters at an obtuse angle – which means less loss compared to other optical design principles in this category of the telescope (catadioptric).

Catadioptric telescopes are a great option for those who want to get up close and personal with their subject. They don’t have two major weaknesses that you’ll find in reflecting or refracting telescopes, like coma pinchers ( Mak ) – which occurs when light spreads out too much- and Schmidt correctors, which doesn’t let us see objects very well at all angles other than 90 degrees off-center. The two most popular forms of catadioptrics Cassegrans include Maksutovs(referred called Mak)represented by SCT

One of the most common issues that you will find with refracting telescopes is chromatic aberration, which occurs when an image has colors on its edge that are not combined correctly. This generally refers to photography but can happen in any type of optics where light waves need combining at some point after being reflected off one object and traveling back towards another different surface layer away from themselves (like water).

Dobsonian vs Cassegrain

With reflecting telescopes, you can have the issue of comatic aberration. This common type of optical error causes stars to appear as though they are being backed by some sort of tail-like object in their place so that everything looks fuzzy around them and distorts what is seen through it! Catadioptric scopes avoid this problem because there isn’t any glass at all inside this kind – just mirrors that reflect light back towards its source with virtually no distortion whatsoever

One of the main challenges with Cassegrain telescopes is that they are costly. The good news? It only makes sense why these higher-quality instruments cost more than others similar in size and aperture! Reflector, refractor, or catadioptric designs all have unique properties which must be understood before you buy one for your next astronomy adventure.

Dobsonian vs Cassegrain

Dobsonian vs Cassegrain both seem great for beginners with telescopes. One big difference between Dobsonian vs Cassegrain choices is how long they take before getting up-and-running when setting up at home but doesn’t let it sway your decision if one has an easier setup process than another

Focal length

When it comes to telescopes, the focal length determines how high up you can look. A short one will give a lower magnification than something long and more powerful.

Weight

The Cassegrain Southern Sky Co. Dobsonian telescope is one of the best on Earth for viewing stars. It’s our most popular model, with its short focal length and wide aperture that makes it perfect to take out into starry nights or when you want close-up views from far off by just adjusting your position in front of this device!

Image Brightness

A Dobsonian telescope is the perfect choice for those who want a brighter, more colorful image. It’s true that you may not get as much detail with Cassegrain telescopes but they are typically less expensive and still produce good quality images.

You can check reviews of telescopes here

Conclusion

Dobsonian vs Cassegrain both are good but Dobsonian is a fantastic choice for beginners, as it has an easy-to-use mount and can help you see deep space objects like nebula or galaxies. But if your budget allows it then there are other options worth considering too Cassegrains have more features but might be difficult on tighter budgets while Schmidt-Cassegrain telescopes provide great clarity at any magnification level with their wide field of view.

The reason why people love using Dobsonians? They’re affordable! so Dobsonian vs Cassegrain both are good according to their needs.

What is a Dobsonian Telescope | Functions, and Features

what is a dobsonian telescope

Dobsonians are a type of reflecting telescope that was invented by Charles Doble. They can be very popular for visual astronomy because they allow you to observe objects without having any glass in front, which would otherwise block your view

This design is used to make amateur astronomy accessible for the masses, so he nicknamed it “the Sidewalk telescope.” Imagine being able to take your own little piece of space right outside your door.

The idea behind this invention came when people were too busy working during day-time hours and didn’t have time or money necessary ingredients like dark skies needed before they could fully enjoy astronomical viewing sessions; however with an adjustable equatorial mount on top (which allows optical instruments stay fixed over one spot) along side low cost construction materials such as mild steel tube frameworks – you can now look through these objects up close without.

Working of dobsonian telescope?

The Dobsonian telescope uses mirrors to direct light from celestial objects. The first mirror reflects the bright rays towards an opening in which it is collected by a second, smaller primary lens-a tall metal tube with an adjustable mount for viewing angles and positions on Earth’s surface. This optical assembly can be removed so users may observe distant stars without having any equipment attached at all; however they will not see anything if there are clouds or other sources blocking their way.

You may wonder what is a dobsonian telescope and why your telescope needs to be collimated. The answer is that it’s necessary for the light bouncing off of an aligned primary mirror, which should send rays directly towards a secondary surface without any loss or reflection in between

A well-done alignment can make all the difference when viewing observations with quality optics like those found on our Sky watcher telescopes.

The Dobsonian telescope is a classic, and it’s easy to use. For beginners who would like see what’s up in space but don’t have much experience with telescopes or just want something simple that they can take anywhere without weighing down their bag too heavily this type of instrument may be right up your alley! As long as you know how to look for stars using these instruments on your own time outside of class (and keep track during designated observing hours), then we’re confident any student could find success through visual astronomy with one built specifically at getting new stargazers into astronomical observation early: The dobsonian design lets users quickly switch between low power mode and higher powered eyepiece

Type of mount we can use:

The Dobsonians are mounted on an alt azimuth platform. To point your OTA towards the stars, you will first have to manually orient it by pushing or pulling its azimuth turntable in any direction that suits you best- this rotates the entire telescope around its vertical axis until one side points toward Earth’s rotation while keeping both celestial bodies centered above our heads! Then adjust altitude so there is no gap between where they meet up with regards distance from earth – repeat these steps for each eyepiece if necessary before tightening control knob when everything looks good enough not too move unnecessarily.

A Dobsonian mount is an affordable, simple telescope that’s also quite robust. This type of attachment system will work well with large aperture scopes because it can handle big optics without any stability issues.The design makes the observing experience enjoyable by giving you plenty to look at all throughout your night-time stroll through nature.

Some astronomers will place their Dobsonian mount on an observing spot to reduce vibrations around the telescope, making for a better viewing experience.

Advantages of Dobsonian telescope :

large apertures :

Dobsonians are the best telescopes for those who want a wide aperture and affordable price. Their large size makes them perfect for visual astronomy, as it provides bright images that can be seen from any location with an open sky view

Aperture is one of three key specifications when purchasing a telescope: other two being magnification power (how many times greater than life-size an object appears) & focal length or length between lens barrel to eyepiece bell This article discusses how dobsonian reflectors provide more light because they use mirrors instead glass.

Great for planetary observation:

Dobsonians are great telescopes for those looking to get their first glimpse of space. Their large apertures make them perfect at collecting light, which will allow you enjoy much brighter images with clearer views inside the eyepiece due to how well Jupiter and Saturn can be seen in some models. Consumers recommend using these designs as an introduction into astronomy since they’re easy on wallet yet offer big rewards.

The Dobsonians telescope are more sensitive than other types of telescopes to atmospheric turbulence, so they need steady skies. If you have great weather and can watch what’s happening up in space without any interruptions or cloud cover then this telescope will be your best friend for viewing giant planets like Jupiter that has four large moons

Easy to use:

One of the best things about dobsonians is how easy it can be to set up. All you need are some simple steps and an observing spot, then choose which one will fit your needs:

A great telescope for beginners is the German Equatorial Mount. It does not need any cables, power sources or polar alignment to work and it’s easy on newbies who are just getting started in astronomy hobbyist pursuits. Many people use them at star parties because they’re so affordable while still providing high quality optics.

Low cost :

The reflector telescope is a great choice for beginners because it offers more power per dollar than other types of astronomy equipment. This makes them perfect to learn with before moving on to larger and more expensive telescopes that offer greater magnifications or different optical designs, such as refractors which use lenses instead mirrors like an OTA (Objective Telescopes). Reflector models also make excellent secondary instruments; some people keep ones they already own just so they can use their old optics in new ways

There is no image distortion:

The more light that enters your telescope, the better. You don’t want to have different colors of light focused at different points which would cause color fringes in an image (for example red on Jupiter). To enjoy a sharp view with no distortion or blurriness you need all LEDs/CCDs behind  the lens be concentrated onto one point so it only takes up space where objects really are; not what they might look like through some lenses because these collect diffused rays instead.

Cons of Dobsonian telescope:

Big Size of Dobsonian telescope:

The Dobsonian telescope is not the most portable option, as it requires space in your car and can be heavy. If you want to go out of town with this equipment or have limited storage for it at home then consider an alternative that will allow more flexibility like investing into a Reflector Telescope instead.

Harder to store in Dobsonian telescope:

Some people think that a Dobsonian scope is only for experts in the field. They’re wrong because this type of telescope can be used by anyone who has enough room to store it! It’s important not only find an appropriate spot but also make sure your home or shed meets its needs as well- competence astronomical equipment need plenty more than just ample storage space; they require high quality Astronomical Telescope Mounts too, which aren’t cheap options at all.

Dobsonian telescope are large instruments with open optics design which makes them susceptible towards humidity buildup on mirrors due dust entering through tube gap during use.

Not suitable for astrophotography:

There are Merely 150 Messier Catalog objects to be found in our solar system. That’s it!. Unfortunately, because classic Dobsonians use an Alt-Azimuth mount and don’t have a tracking motor for DSLR cameras – they’re not suitable if you want better astrophotography results with deep sky objects like galaxies that shine brightly in space.

You can check reviews of telescopes here

Conclusion:

The Dobsonian telescope is a type of reflecting, equatorial-mounting device that has been gaining popularity in recent years. The light is focused through the optics and then reflected off to a secondary mirror. This reflective surface makes up much of the optical tube assembly (OTA).. This design makes it easy for amateurs and enthusiasts with limited finances and space, like students or apartment dwellers, to start exploring outer space right outside your door.

Reflector telescope Vs Refractor telescope

Reflector telescope Vs Refractor telescope

The main difference between a reflector telescope and refractor telescope is that the former captures and concentrates light, while the latter reflects it. This means that in order to get an image with a refractor telescope, you have to look through the eyepiece at the right spot of what you are looking at, so your head needs to be positioned properly.

With a reflector telescope, on the other hand, all you need do is move yourself around until your eyes are looking into its objective lens. This makes them much easier for children or novice stargazers to use than their counterparts. Refracting telescopes use lenses made from glass or plastic which can capture more light because they’re not being reflected by mirrors.

Reflector telescope

A Reflector telescope is a type of telescope that uses mirrors instead of lenses to collect and focus light. There are three main types of reflectors: Newtonian, Cassegrain, and Ritchey-Chretien. Each have their own unique advantages over the others. The most popular being the Newtonian because it’s affordable for many families or amateur astronomers alike.

How Reflector Telescopes Work

The newton telescopes are not just a harmless hobby for your average person on the street, they’re also one of the most widespread reflectors in our society.

The light coming from stars goes inside these optical tubes and is first reflected off an elegant mirror at its extremity called a primary lens which makes it possible to see what’s happening with all those converging beams up close – how could we ever learn without seeing? But after that comes sorting out where those different paths diverge: finding some way so as many rays go towards us (our eyes), while others stay away-and this task falls upon.

Reflector telescope Vs Refractor telescope

Optical quality in reflectors

We will be discussing the optical quality of reflectors. Reflectors are used to amplify light and they come in different shapes, sizes, and materials. A common material for a reflector is metal because it can easily conduct heat. Other than metals, some other popular materials are glass or plastic which offer excellent transmission of light but less reflective qualities than metal.

We will discuss why you should choose certain types of reflectors based on what you want them for. Reflectors are important to use with solar ovens because they act as mirrors that focus more sunlight onto the cooking area where food is placed inside an insulated box or pot outside your house during the day when the sun is out. They also help prolong battery life by reflecting back infrared waves.

Practice in Reflectors Telescope

Reflectors are a powerful tool used in psychotherapy to help clients explore their feelings and thoughts about an event. The client is encouraged to give the therapist feedback on what they observe, such as “I noticed I felt sad when you said that.” This type of reflective listening helps therapists understand how the client feels.

The use of reflectors can be traced back to Carl Rogers’ work with client-centered therapy where he emphasized the importance of empathy and reflection by using words like “What I hear you saying is….” or “It sounds like…” These phrases were designed to encourage his clients to say more about their experience instead of just telling him what was happening externally.

Best Features of Reflector Telescope

The Sky consecutively topped our list – not only because it has an affordable price and big aperture for deep-sky observation, but also due to the mirror optics which possess no chromatic aberration problem. If you’re just starting out your astronomy journey then we recommend this little guy.

Refractor Telescopes

Refractor Telescopes are used to take pictures of objects in space. They are typically lightweight and have lenses that can be adjusted for the desired focus. Refractors are often less expensive than other types of telescopes, but they do not show as many stars or planets because their objective lens is smaller.

How Refractor Telescopes Work

The principle of the Keplerian telescope is very similar to that found in a monocular. The light goes through front lens, key element making beams converge at eyepiece holder where we install an eyepiece or camera for viewing purposes; this type can be lighter and more compact than larger reflector telescopes because they do not collect as much visual information with each pixel collected by their objective lenses but offer better optical quality so users don’t need any adjustment from themselves while observing.

Also helpful content: Is a Refractor Telescope better than a Reflector? 

Optical Quality in reflectors

Reflectors are a major component of any optical system.  They can be designed to have various aberrations that will determine how well they work in the specific application. In this blog post, we’ll take a look at some of the common types and their effects on an optical system.

There are three main types: spherical, aspherical and free-form surfaces which all vary in cost and performance. Spherical reflectors offer more uniformity with less aberration than other shapes but they also come at a higher price point than aspherical or free-form surfaces which typically perform better for certain applications such as laser light show systems, planetarium projectors and high powered LED lighting fixtures.

Best Features of Refractor Telescope

It is a high-quality wide field imaging camera that can take photos without distortion and in any direction. It has no need for collimation, which makes this product easier to set up than traditional telescopes with their elaborate equipment setups as well as needing precision pointing at celestial bodies like galaxies or solar systems from Earthly observatories where light must be blocked by an atmosphere before being scattered outwardly into space indefinitely so only those traveling faster than its 60x speed limit would ever reach them; but there are none available here. This model instead utilizes closed system technologies such say Pinhole Photography rather then relying upon open ones like natural sunlight.

REFLECTOR TELESCOPE VS. REFRACTOR TELESCOPE, WHICH IS More BETTER?

In reflector telescope vs refractor telescope If you are interested in astrophotography, purchasing a refractor is the best option. It’s specialized optic design can capture objects like galaxies and nebulae which deep space photography requires while cheaper reflector telescopes aren’t as efficient for brighter celestial bodies like planets or Moon since their smaller size limits what they show us at any given time (unless we’re lucky enough to have both).

A beginner would be better off with either type of telescope depending on his/her needs but will eventually want something more advanced when he feels ready because these devices require maintenance just by observing from within them; setting up precision software required too.

You can check reviews of telescopes here

Conclusion

Reflector  telescope vs. refractor telescope  in  refractor is the best option for astrophotography enthusiasts because it’s specialized optic design can capture objects like galaxies and nebulae which deep space photography requires with ease.

A cheaper reflector telescope may not be as efficient in capturing these types of celestial bodies since their smaller size limits difficult when trying to cut them due to less surface area contacting the blade, meaning more force will need put into each stroke than wood alone that provides much better grip due its natural oils present on both sides – so cleanup might become an issue too.

How To Connect DSLR to Schmidt Cassegrain Telescope

how to connect dslr to schmidt cassegrain telescope

The first step to enter the world of astrophotography is attaching your camera. Attaching a camera properly can be tricky because different cameras have different attachments, but it’s important for capturing pictures through telescopes.

A simple tutorial on how attachable you are with astronomy will teach beginners everything they need know about taking great images in space from objects like planets down deep-sky photos which show us what lies beyond our own Milky Way galaxy.

DSLR cameras are a great way to start capturing deep sky astrophotography images from home. DSLR stands for Digital Single Lens Reflex camera and it’s the type of Camera we recommend because they make taking pictures easier than ever before! You can connect an advanced or entry level model with any telescope (even Rowe Guide scope mounts!) like never been done before, giving you access to incredible views that would otherwise be out-of-reach without expensive equipment.

Steps to connect DSLR Camera Schmidt Cassegrain Telescope:

A DSLR camera can be attached to your telescope using a T-Ring that locks onto the body, and an adaptor. The prime focus adapter is inserted into one end which contains internal threads for installation in any 1″ or 2″ barrel (nosepiece) of another device such as eyepieces , Schmidt-Cassegrain reflectors etc., while at the other end there are female flared ports large enough accommodate standard Nikon Bayonet Lenses with its bayonets fully extended . To use this equipment you must first match it up properly.

A camera is an important part of any astronomy experience. But it can also have its drawbacks, such as being distracted by the light from sighting in your telescope or swaying while you are trying to take pictures because there isn’t enough weight on top of yours for support!

I recommend getting yourself some extra counterweights so that nothing drops during use and makes everything more difficult than necessary – just make sure this doesn’t cause accidental slippage inside either foggier holes where held together with screws designed specifically made to hold these pieces securely into place when needed most (i..e eyepieces).

Connect DSLR to Schmidt Cassegrain Telescope

Some telescope designs (especially ones that were designed for astrophotography), will allow you to thread the camera directly onto your T-Ring. This is an optimal configuration because it offers higher levels of security and better stability than other methods, such as using a beanie cap or lens cover on top

The deep-sky astrophotography method is the best for those who want to capture night sky photos with greater clarity. This process does not use an eyepiece or Barlow lens, which means that you will be using your fixed native focal length (magnification) on any telescope in front of it; all images are taken at once through this kind of shooting approach.

For higher magnification photography of smaller targets such as the planets or Moon, it is best to use an eyepiece projection. This method involves placing an eyepiece between your camera body and telescope using one of these adapters (the ones that fit onto both).

An Adapter for high magnification views of solar system objects:

A flattener/reducer is a useful piece of equipment, designed to reduce the magnification from your telescope. It has additional glass elements that are placed inside an optical tube along with it for optimal viewing experience when using refractor telescopes. If you want all those stars in one frame instead spread out across several photos then this accessory will do just what its name says – flatten everything so there’s no distortion

Instructions:

The first thing you will need to do is remove the camera lens that’s currently mounted on your DSLR. A T-Ring with an indicator designed for fitting your particular model number should thread and lock onto it just as a Lens does, but there may be another indication of success – if not both indicators are visible at once then they’re lining up correctly! Next, threading adapters into place provides us telescope owners access between our favorite tool (the focuser)and its accessories like eyepieces or filters; these tips come threaded either one way only through their respective insert holes

1.25″ and 2 inch T-Ring Adapter noses are the standard size for a variety of scopes, but it’s important to choose one that works with your particular telescope focuser opening as they can be different sizes

Once attached, your camera will utilize the native focal length of your telescope in place of a lens. If you have an 800mm focal length on telescopes but are using it for shooting stars and planets with just one optic then know that 1x magnification is expected because this also include scrop factor which comes into play when using APS-C sized sensor Full frame DSLR cameras can take advantage fully out enough light so they don’t need additional accessories like filters or dark Solar Filters

To capture the perfect astronomical photograph, attach your camera to a telescope with this remote shutter release cable. You can even set it so that each photo will fire off automatically

Where to place Camera Filters:

There are many ways to take photographs of the night sky. One way is with a camera, telescope and filter that sits in front or on top of your lens housing at all times-the clip-in type filters for instance

Filters can also be attached directly onto either end when using internal threading adapters so they don’t have any impact on how well-lit up something appears close

A clip-in style filter is a great tool to have when using your camera with either a telescope or DSLR. These filters completely cover the sensor on your camera, while allowing you to attach T-Ring adapters in front of them for different lenses

I often thread a 2″ light pollution filter to the end of my field flattener/reducer or adapter. Some flatteners, such as Flat73 include spots inside for screws that can accept filters – this is convenient when using different camera bodies

I took the following pictures of an open night sky from my backyard with a Canon EOS 5D Mark II DSLR and Opto long L-Pro filter. The light pollution in this area was Class 8, but not to worry! Using filters like these will help you take clear astrophotos even when there are lots going on up above (pun intended).

You can check reviews of telescopes here

One might wonder why anyone would attach their camera to a telescope in the first place. Well, if you already own a telephoto lens with a focal length of 300mm or more then using that for astrophotography may be your best bet before connecting it up. To accomplish this type of photography requires an equatorial mount which matches up perfectly with how fast our night sky rotates so its motions are easy to keep track of when taking long exposure images

A camera lens is a more common instrument for photographing the night sky, but a telescope also captures images. The two most prominent differences between these lenses are that cameras have auto-focus and image stabilization while telescopes lack those features as well as being larger with longer focal lengths to maintain stability on Earth’s surface or space without any movement whatsoever from its target object(s). There may even be some advantages when it comes down to how much you can see since stars appear dimmer through an obstruction so if clarity matters go right ahead.

How To Collimate Newtonian Reflector Telescope | 2024

How To Collimate Newtonian Reflector Telescope

Have you ever had a guitar that sounds so beautiful when played it makes your heart soar, but after a while the tune becomes off-key? What do we usually do in this situation – learn how to fix our guitars or trade them for pianos! Learn all how to collimate Newtonian reflector telescope with me today as well.

Suppose I showed up at your doorstep one-day claiming ownership of an angelic sounding stringed musical instrument only recently acquired from some mysterious benefactor who wishes us both luck learning its intricacies through time spent playing together under the moonlight while sipping wine harvested locally by slaves’ emancipation milestone being just around the corner before sunrise tomorrow then words can’t express what

A reflector telescope will produce great images of stars and planets, but if you don’t keep it tuned well then the magnification can be lost. This is collimation in astronomy-speak. To master this technique though, one must know that all celestial bodies have an axis which refers to their altitude above or below Earth’s surface: they appear increasingly small as we look at them from farther away because there are more distant points along our line of sight which define their boundary; conversely when looking down on something close by like your house for example (which has its own hyperbolic axis) everything comes into focus since none exist very far off CenterPoint the closest point equals infinity so.

Information about How To Collimate Newtonian Reflector Telescope

The forward element of your telescope is an important component. It’s designed to redirect light from the object you are viewing and bring it into better focus for your eye, making everything seem clearer than before! The two secondary mirrors align with respect not only between themselves but also relative angles off each primary mirror so that all three meet at infinity when observing distant astronomical objects or even just everyday life on Earth below – which would otherwise be impossible without this system in place (and who wants their view obscured?). how to collimate Newtonian reflector telescope isn’t hard once they’ve been collimating during manufacture since then any misalignment can easily.

Collimate Newtonian Reflector Telescope

The Primary Mirror

The paraboloid mirror is at the bottom of this tube, and it has an aluminized surface that reflects starlight. The important thing to know about its symmetry — or more specifically its optical axis- where images are crisp as they can be! In other words, if you’re looking through anything with multiple lenses (like your average telescope), then those will have some degree of focus because there’s no single point light source for them all converge on; instead,

we see various points shining out from different angles which leads us into confusion when trying figure out what part should represent any particular object since sizes may vary depending upon how far away something appears versus others nearby objects whose distance doesn’t seem too drastically altered my perspective changes caused

The size of a mirror’s sweet spot depends only on its focal ratio (the distance from the object to the focal plane divided by twice that amount). This means any type and size of the mirror can produce diffraction-limited performance within an 8 millimeters (.3 inches) circle at their front surface, but not more than 22 mm in diameter due to geometric laws.

To make how to collimate a Newtonian reflector telescope, the center of your telescope mirror should be marked in some way. I recommend using an electrician’s tape and making sure it is smaller than your diagonal (mirror). As long as you do not make any holes with this technique or use an adhesive binder reinforcement ring; anything will work for keeping things from flying out!

Secondary Mirror

A secondary mirror is a small, flat piece of glass that can be attached to an eyepiece and used by telescopes. It serves as the “diagonal” between your eye (the primary) and viewing lens in order for you to get decent astronomical views without having all light blocked out by diffraction effects caused by looking at just one spot on top of one mirror! The reason why this works so well–and what makes it worth knowing about—is because when observing planets or other objects up close through binoculars/close-up lenses+, everything will look much more distinct than if they were observed using only

Eyepiece

The eyepiece is the third optical component in a telescope system. It magnifies and forms an image at its focal plane, which should be aimed at or near to where we see most clearly: our own eyes!

A simple way for beginners who don’t know how this works yet would be if their eyes were right before them; then they could simply look through the tube with no other device needed between themselves and outer space (though there may still need some adjustments).

A good eyepiece will render a sharp image in the central parts of your field of view, but if you’re looking to capture images with less distortion at faraway objects then it’s important that both primary mirror and any lenses are collimated symmetrically.

Now that you know what to look for, take a close inspection of the focuser and try to identify any optical parts. This will be best done during daylight with your telescope aimed at the ceiling or sky (be careful not to be near where there is sun). The illustration on right shows how things should appear: in secondary mirror holder where an elliptical face can now easily have identified tilted 45 degrees; also visible are its circular edge traced by reflected light from primary reflecting 43 diopter Prisms found within it as well!

Steps How To Collimate Newtonian Reflector Telescope

You’ve got your eye on the prize, and now it’s time for you to get serious. Turn off any devices that might be distracting from what is happening in front of them—your know-all those light shows we mentioned? Now put away anything but one-half hour before use; focus telescopes are very sensitive instruments! First step: center secondary mirror so bright object can fall onto its face (secondary). The second step aim eyepiece at the primary spot where the sun would go if wasn’t blocked by Earth or the moon)? Thirdly position yourself over said sweet

Step1:

How to collimate Newtonian reflector telescope making sure your telescope is centered perfectly for viewing both the primary star and any planets or Messier objects in its path, start by aligning it. A good way of doing this with either an equatorial mount or a got type Dobsonian optical tube assembly (OTA), such as those made by Orion Telescope &Explore Technology Corporation., would be using their built-in alignment tool called “The Finder” which allows you simply look through this small hole at whatever’s up there without having line anything else apart from direct sunlight coming off them—a perfect setup if one wants minimal interference while trying different things out!

It may be difficult to distinguish the edge of your secondary mirror from its reflected image, so place a piece of white cardboard in between. The mirror should appear round and well centered within the sight tube if done correctly. If not adjust either holder or focuser accordingly by adjusting the center bolt which joins them together as shown here

If the error is toward either side of your sight tube (90° to its optical axis), check if you have a centered secondary in your reflector telescope. If not, then adjust mounting screws on the spider until it’s right where it needs to be!

Step 2:

Once you’ve adjusted the secondary mirror to focus on your target, adjust it once more and make sure that everything is perfectly aligned. You can use either crosshairs or the outer edge of this part in order for its reflection to be centered within the sight tube, but be careful not too far down because if there’s no distance whatsoever then only half will show up!

A laser collimator is perfect for aligning the secondary mirror. Center its beam on top of a star right in front, then use an aiming tool to make sure it’s centered properly as well (a small misalignment won’t be noticeable). Once aligned correctly with your optics setup and using magnification filters appropriate for observing deep-sky objects such as stars or galaxies from ground level clear skies; take care not only when scanning across them but also up close! Make adjustments accordingly depending upon what type(s) you’ll observe during Step 3

Step3:

The final and most critical step in aligning your telescope’s optics is tilting the main mirror up so that it can be centered with respect to its focuser. This procedure should only be done at night, as changes due to temperature fluctuations or routine handling may cause components like lenses within a reflector optical tube system to shift enough for collimation issues.

Adjusting the primary mirror is a crucial step in making your telescope. The best tool for this procedure is a Cheshire eyepiece, which will enable you to view and adjust its reflection while looking onto it from behind or through an open tube with no obstructions blocking any light paths within your observing setup;

if performed correctly there should not be much more than just adjusting screws on either side of center! You can move back and forth between observations by turning these adjustments until they align perfectly over every detail visible across most magnification ranges – but don’t forget about using assistants too: having someone else assist during those moments where eye movements tire out after extended periods could prove invaluable so long as they know what their job entails beforehand

When Step 3 is done, the optical axis of your reflector telescope will be perfectly centered in its focuser. Collimation has been completed and you can now enjoy a clear night sky with all-stars appearing entirely uniform from horizon to the zenith! But don’t forget that even though it may look like there’s something wrong here (something being an off-center Cheshire eyepiece), this condition actually comes as no surprise because secondary mirror mounting plates are designed so they’re slightly elliptical — meaning their manufacture must account for some degree or another when creating perfect alignment later down and A small hole was poked through

A laser collimator is often used for Step 3, by centering the returning beam on its faceplate. However, this method has problems: suppose in Step 2 that there’s been an error of approximately 2 mm with respect to where you thought your primary mirror was centered? Even if it happened so closely aligned as now be exactly what we call “collimated” (having no measurable alignment difference), then when rays are parallel and miss each other completely by 1mm or more!

Forget the laser collimator, it’s not necessary for aligning a telescope. A better option is to use an eyepiece that has been specifically designed with long focal lengths in mind and also has great color correction so you can see subtle details more easily like stars and nebula!

The most important thing when using these types of instruments? You need lots of light since they are sensitive even at night time viewing conditions- making sure your setup provides plenty o’ sun.”

STAR-TESTING YOUR COLLIMATION

There are many benefits to using a reflector telescope, but it’s important that you know how to collimate your instrument before starting out. Collimation refers to the process of adjusting an optical tool so its mirrors line up precisely and give perfect images on objects viewed through them (e). Once this has been achieved for best results, look at stars in different locations around

If your mirror’s center spot is off, don’t worry about it for now, and try tweaking the primary collimation in small steps until you have centered an image best seen through both eyes. (This method was described in detail on page 125 of Sky & Telescope June 2001 issue.) The Cheshire symbol will indicate where the true optical center lies with respect to the circumference at a point just behind nasal cavity/border area between bridge of nose-mouth opening – look here if that fails

If you know that your primary mirror spot is okay (and in most cases, it will be), there’s no need to routinely fine-tune collimation with a star test. The Cheshire eyepiece makes it easier and more accurate if the seeing sucks like tonight!

Now your reflector telescope is in perfect tune, and the improvement will be obvious. If not, try to deliberately miscollimate primary optics for a high magnification view planet-ward before letting them go out of collimation again!

You can check reviews of telescopes here

Conclusion:

A Newtonian reflector telescope is a perfect tool for beginners. It’s affordable, easy to use and it can be used anywhere in the world! With a little bit of attention, you’ll have your instrument ready for some star performances. There are many advantages that come with owning this type of telescope which include its affordability, ease of use, and portability. If you’re on the fence about whether or not to buy one, then I hope my blog post has convinced you otherwise because they’re great tools for beginners who want something simple without breaking the bank.

How does a reflector work? | Best telescopes Guide

How does a reflector work?

A reflector is a device that reflects light in order to direct it back towards the original source so that you will know How does a reflector work? They are most commonly used in photography and film production for this purpose, but also can be found in other applications such as street lights and traffic signs. Reflectors come in many sizes and shapes, with some designed to work best at specific angles or distances from the sun. With so many different types of reflectors available on the market today, how does one know which one will work best?

What is a reflector?

Reflectors are an important tool in the world of photography. They are used to either bounce light back onto a subject or reflect light into the shadows. Reflected light can be helpful for photographers who want to create more natural looking images without having to use flash, which can sometimes result in unflattering photos due to red-eye and other issues. Reflectors come in many shapes and sizes, with some being collapsible for easy transport.

Top 5 tips for How does a reflector work?

One of the best ways to get great pictures is by using a reflector. You can simply hold it at an angle that reflects light like how you want, then watch as different types and colors come into focus with just one simple tool. A small but powerful piece of equipment for any professional photographer on-the-go or those looking forward to starting up their own photography business.

reflector work

Position to holding a reflector

If you hold the reflector directly opposite the light source, it will give off a lot of bright and intense illumination. Depending on how much there is to start with though, not all angles or positions can get lit up in this way because some parts just don’t receive as much reflection from another angle or position, so they’re left out entirely when someone casts shadows onto them like below without even knowing that was happening.

Using a reflector to fill in shadows

An odd shadow can be fixed with a reflector. If the source of light is directly behind your subject, it’ll help prevent an undesirable silhouette from being created by using one in front. For instance, if you are shooting towards someone who has their back turned on the camera; placing something like this close to them will fill those dark areas and make everything come out looking great.

Try different angles

It’s not just portraits that benefit from using a reflector. Laying the reflective surface on its side or at an angle can help prevent under-eye shadows when taking pictures of people who are facing away from you, like in this example shot by Adeline Salisbury for V Magazine UK.

Attach the reflector by using a stand

You know that perfect angle of your subject? Well, it’s impossible to hold them there and still take a picture. Not all photographers are lucky enough with great hands or arms! But don’t worry; just get some help from friends or attach the reflector onto something sturdy like furniture so they can stand on their own for poses while capturing headshots – of course, if you need any props at all, let me know because I got this.

Take distance into consideration

Remember, distance matters too. One of the most common mistakes people make when shooting with a reflector is not being aware that they need to place their reflector further away from themselves and in order for its optimal use as a well-placed light source. Mimicking natural sunlight can be tricky due so much depends on where you stand within relation both physically AND mentally but there are some basic rules one should follow such as bear minimum distances between: yourself (subject), reflectors/diffuse panels, etc. This article will cover everything about working out these problems through trial & error; first, let’s explore what happens if we give our subject more than 1 reflective surface by testing different arrangements.

4 Reasons to use a Reflector in Photography

Amplify a poor light source

A reflector is a perfect solution for those who want to take their photography skills in dark or dimly lit environments. By redirecting light from stronger sources, you can make it more intense on subjects without having the need for using harsh studio lights and much expensive equipment like photo-light boxes that cost an arm and a leg! Reflectors come cheap too – they’re not even particularly heavy so transportation shouldn’t be difficult either if needed transport needs are outside your home area/city limits.

Photography reflectors are a great portable and easy-to-carry around lighting solution for those who need quick artificial light. They’re also much lighter than additional photo light boxes, so they can be taken anywhere without taking up too much space in your kit bag.

Diffuse a light source

Have you ever looked at a photo and been dismayed by the harm that too much flash or direct sunlight can do? An undiffused light source will wash out all features of an object in a way where harsh shadows fall on it. This problem occurs because generally, artificial lighting sources dispersion unevenly with natural ones; due to this fact, there’s only partial blast from such as an item which makes them overexposed when taken photos by us humans.

Diffusers come in all shapes and sizes, but they work by evenly spreading light passing through them so that the result is soft or diffused. These often have ‘5 in 1’ photography reflectors to help illuminate objects without creating harsh tones for food & fashion photographers who need their products photographed against a delicate background. A photo doesn’t look appetizing unless it’s lit well enough- Diffusing your strobe makes sure you get lovely photos every time.

Achieve special effects

With the right reflector, you can create a range of lighting effects. For example, think about how dark rooms will only show one object in focus or how models lit by just their eyes look angelic and ghostly at nighttime while other parts are highlighted with brilliant light that illuminates all around them. Reflectors also come in handy when trying out new techniques like backlighting which creates contrast between elements on your model’s clothing front facing us as they turn away from the camera slightly creating depth into those clothes.

Block useless light sources

Photography reflectors are a great tool for wildlife photoshoots because they can block out unwanted light sources. This means that animals, who would usually be running away from the harsh lights used in shoots with no barriers or reflective surfaces, will stand still as you take their picture.

Four things to consider when buying reflectors

There are an overwhelming number of options when it comes to reflectors. They come in different sizes, shapes, and colors all with their own unique properties that can be used for photography or stage lighting purposes.

No one wants only a few basic tools on hand; they prefer the comfort of knowing that there’s always more behind them if needed! There’s much available under this category: lightsabers (for any costume party), spotlights (the popular kind!) plus many others you may not have considered before because let’s face it – a reflector isn’t really what springs into mind first off as something needing reflection.

Size

Size is an important consideration when purchasing a light. Larger lights are softer, so if you pick up the smaller reflector it will likely create harsh shadows whereas with too large of one your pictures might not have good detail or be well-lit anymore due to its size and shape being more difficult for cameras to see through. A 42” middle ground would work best since this provides nice soft lighting while still having easy handling qualities.

Shape

You may think that all you need for a statement make-up look is some eye shadow, but there’s so much more than just what goes on your face! The shape and size of the light source can have an effect too. Along with determining how large or small these sparkles appear in someone’s eyes, keep in mind that reflectors also play major roles as catchlights or lights reflected back into their own pupils – which means every detail matters when it comes time to create such creative looks.

Color

A reflector can be the difference between a great photo and an average one. A silver or white reflector will bounce more light than gold, which has warmer tones that warm up your surroundings in post-production with Photoshop software. The drawback is these softer colors may not provide enough contrast against darker elements like buildings at night when using flash photography on stage sets which require sharpness for clear shots. The perfect balance depends largely upon what type of scene you’re shooting — a landscape with deep shadows might benefit from including both reds/oranges as well as greens so they pop offstage while still preserving detail such as mountains.

There are four colors to choose from when it comes to Four-in-one reflectors. You can get silver, white or gold on one side with a black cover for blocking light in dark situations – all this is available without any additional gear! The most common tends to have two sides which provide an option between these two options so you won’t wind up wasting your money if something doesn’t suit what you need right away.

Handles

There are a number of factors to consider when choosing the perfect reflector. Handles make them easier to use, while fancy ones can stretch out over metal frames and be more expensive but also last longer if needed. Size is an important factor as well; small or thick pieces may not provide enough coverage for your images without being too heavy-duty which could cause other problems with handling equipment like lights.

A reflector is a tool used for a variety of purposes, but it’s best known as the go-to when you want to add some extra light in your photos. They come with different qualities and warm/cold surfaces so there are lots of options available.

You can check reviews of telescopes here

Conclusion:

Whether you’re a professional photographer or just want to take better pictures, your goal should be to capture the best possible image. One of the most important factors in achieving this is having an excellent reflector that will help bounce light back towards your subjects and allow for more natural-looking photographs with less chance of shadows. If you’re looking for one such product, we recommend checking out our line of photography reflectors at best telescopes guide because they are designed specifically for these purposes and come in many different sizes and shapes.

How Does a Dobsonian Telescope Work?

How Does a Dobsonian Telescope Work?

How Does a Dobsonian Telescope Work? The Dobsonian is a type of telescope that utilizes the design principles of Newtonian reflectors. It has two mirrors, which can be adjusted to make images larger or smaller for you as they are reflected off them in accordance with your viewing distance. so we know that how Does a Dobsonian Telescope Work?

The Dobsonian is a type of telescope, and its base is designed by John Dobsons.The Dobsonian telescope was originally called the Dobsnor by its inventor, but he continues to deny this. In 1965 though it became popularized when astronomer John Dobson brought his show on street corners for people all over America.

The Dobsonian setup allows amateurs to get bigger and better mirrors, which aid in seeing items deeper in space. In fact, many people who are more experienced will often build their own based on what they need or personal specifications for viewing planets , galaxies etc.. For most it’s just one step towards sightseeing with binoculars as well telescopes!

What types of Mirrors Does Dobsonian Telescope Have?

This kind of telescope will have the same type of mirrors as a Newtonian reflector. There is an open end where light enters, and at bottom there’s a main mirror which gathers all incoming rays to itself before being reflected off into your eye for viewing purposes using either eyepieces or just one large one on top if you don’t need them!

It’s often said that bigger is better, but this isn’t always true. telescopes How Does a Dobsonian Telescope Work? with mirrors of a certain size and the larger you go beyond those limitations will result in decreases in performance or an inability for some applications altogether without extra components like large lenses (lens makers).

For instance; there’s only one mirror diameter available on most Dobsonians which means it can be difficult if not impossible at times to find any good quality optics outside these restrictions – especially considering every aspect from eye relief point up must match exactly as per my requirements!

so we know about How Does a Dobsonian Telescope Work? this One of the first things you need to do when buying new mirrors that How Does a Dobsonian Telescope Work?. This ensures there are no warped images, which can be caused by incorrectly aligned optics or an incorrect focal length setting on either end of each mirror’s beam path.

How Does a Dobsonian Telescope Work?

Eyepieces for the Dobsonian

The eyepiece you use for a Dobsonian is the same type used on an Newtonian. It’ll allow better focusing, but it’s all up to how much light can get into your telescope – and whether or not that shines through to form images in our eyes!

Information About the Mount

The mount is what distinguishes the Dobsonian from a Newtonian telescope. To create his products, he started with simple and inexpensive parts that anyone could make themselves or buy at their local hardware store for cheap – like mirrors ground by hand in this case!

Mounts can be made out of anything: metal scraps found around your house; old plastic plates you might have laying around too (the inventor even said if it’s not broken don’t fix it). There isn’t much to them other than two rods connecting points on either side which hold up several lbs but does its job well enough without all those fancy gears we see nowadays since they add weight as well

So how Does a Dobsonian Telescope Work? Dobsonian telescopes are easy to use because of their two-axis mount that smoothly centers objects in the mirrors. This is made from handles, which allow you to balance and move it without any difficulty at all.

How Does a Dobsonian Telescope Work

How to set up Dobsonian?

The Dob is a device for those who want to have an easy time looking up at night. It’s set up simply with one tube attached and screws that can be turned until they meet certain requirements so it will remain still on the ground while being stable enough not move around too much when Telescope Slides are adjusted, but just tightened enough where there isn’t any play in its movement between both weight distribution as well as rigidness from each side using tension tools like pliers or fingers depending what works best based off your preference!

You can either point the telescope in a certain direction and watch it swing around, or just let go of its handle. Either way you are excited to see all there is up above!

The Objects Seen by using Dobsonian

Even with a small telescope, there are many things that can be seen. The surface of the moon is explored in detail and deep-sky objects beyond our Solar System are visible too!

The smaller the scope you have, the harder it will be to see these celestial bodies but don’t let their size stop you from experiencing all this beauty firsthand–just move up if necessary so your eyesight doesn’t get frustrated at trying hard enough when looking up into space.

With a big enough telescope, you could even see something like this! It is an old star that has died and released its energy in the form of light. The region where I live is known as M46 – 3,000 Light-years from Earth

You can check reviews of telescopes here

Conclusion

A Dobsonian telescope is a great choice for people who want to enjoy amateur astronomy from their backyard. In contrast to Newtonian telescopes, they have two mirrors that can be aligned and then attached to either side of the primary mirror in order view objects very far away with crisp images!

The main advantage this type has over other types like Schmidt-Cassegrains or Maltby 0’scopes, which use lenses instead? They’re easier on your pocketbook – because you don’t need expensive optics if all your budget stretches only up until purchase price point where there’s no difference between them anyway (though many opticians will make any tweaks needed). If considering setting one up at home though let me offer some advice: Make sure it has as

Dobsonian telescope vs Reflector | Best Telescope Guide

Dobsonian telescope vs Reflector

The main difference between Dobsonian telescope and Reflector is that Dobsonians use mirrors to focus light, while reflectors use lenses. This means that Dobsonian telescopes are generally bigger and heavier than their more compact cousins, but also offer higher magnifications. Reflectors usually have wider fields of view, which makes them ideal for viewing large expanses of sky or deep space objects with plenty of detail.

Dobsonian telescope

The Dobsonian was introduced in the 60s by amateur astronomer John Dobson. He often said that he didn’t ‘invent” much with his invention, yet it helped introduce astronomy to more amateurs and has an important place amongst other telescopes today like Gemini or Newtonian reflectors which are also popular for their affordability compared to newer designs like Schmidt cameras.

The Dobsonian telescope is the most popular type in use today because it’s generally cheaper, easier to use and can be had by anyone. What makes this even better are some nifty features that make using your favorite scope more cost effective.

Also read helpful article on what is a dobsonian telescope

Altazimuth mount 

The Dobsonian telescope is the trademark of all Altazimuth mounts. This type of mount can be better for amateurs as it uses one pointed Celestron altazmount vs two legs like those that an equatorial model would have, making them easier to use than other designs and allowing you more stability when looking through your scope at night skies
It’s also worth noting how different these types really are: while most reflector-based observing tools require German Equatorial Mounts (GEM), or some other formative device.

Dobsonian telescope vs Reflector

Tubes 

To save money, Dobson decided to use cheaper tubes instead of the expensive fiberglass ones. The same type used for holding cement is strong enough and will not break when lifting your telescope up off floorings so you don’t need special equipment like cranes or scaffolding.

Mirrors

The thinner, cheaper mirrors that Andrew Dobson introduced are what made his telescopes more popular than those with thick Pyrex glass.

The Dobsonian telescope is a classic optical reflector that can be moved up and down left or right to change the magnification. The name comes from its originator, John Dobson (who also developed his own design for an altazimuth mount). Unlike other telescopes which have been invented many times over since their inception in 1608 -such as Cassegrainian designs-, this type follows allure of reflecting systems used during amateur astronomy before then: As seen through refracting lenses/spots etc.

Reflectors Telescope

Reflectors are a type of reflecting Telescope due to their ability work optimally. They use mirrors, which make them different from refractors that uses lenses- though this difference makes reflector more expensive and less popular amongst amateur astronomers who want the hobby without paying too much money for it or being unsure on what they’re doing themselves as is often seen in those just starting out with astronomy pursuits.
In some cases where people have certain needs but budget restrictions don’t allow them full flexibility when finding instruments, secondary markets open up so called “reflection” telescopes designed specifically around these desires

The reflecting telescope is a cheaper, easier to use alternative to the more expensive and complicated refracting models. They were invented by Issac Newton who called his invention “Newtonian.”

The Reflecting Telescope is a device that lets you look through the heavens and see what’s out there. It works by collecting light from an object on its large mirror, then reflecting it onto smaller secondary mirrors which project images of celestial bodies for your eyes only – they’re not visible with naked eye anymore.

Also read helpful article on Reflector

Dobsonian telescope vs Reflector Which is Better?

Dobsonian telescope vs reflector telescopes both have their pros and cons. The size of the mirror in a Dobsonian telescope is bigger than that of a reflector, which allows it to collect more light from distant objects. However, this also makes Dobsonian telescopes heavier so they are not as easy to move around. Reflectors are sleeker with smaller mirrors so they are easier to transport but less powerful for viewing far away objects.
The most important thing when picking out your new telescope is what you want it for! If you will be mainly looking at things close up then go with a Dobsonians but if you plan on viewing stars or galaxies then go for the reflectors.

You can check reviews of telescopes here

Conclusion

I hope this guide has been able to clarify and outline the major differences between a Dobsonian telescope vs Reflector , which you can get for beginners.

Dobsonian telescope vs Reflector are two different types of telescope. A reflector uses a parabolic mirror to collect light, whereas a Dobsonian uses an open tube with one or more curved mirrors at the back end. The price for these telescopes is similar but there is no standard pricing system so it’s hard to compare them apples-to-apples.

In general though, you’ll find that reflector telescopes tend to be cheaper than those made from other materials like glass lenses because they use less material overall. If cost isn’t your main concern then you can consider how each type might fit into your specific needs as well as their pros and cons before making a decision which one will work best for you according to your need. As mentioned before these are made by many types of mounts with mirrors or reflectors depending on what you want in your viewing experience; they also come at different prices so there’s something out there perfect for everyone.