What is a Schmidt Cassegrain Telescope | 2024 Guide

what is a schmidt cassegrain telescope

One of the most popular types for amateur astronomers is a Newtonian reflector, which was invented by Isaac Newton in 1670. TheseIsaac Newtonscope’s are named after him because they bear his fingerprints; each reflecting surface has two mirrors that share light equally before sending it out toward infinity . These devices are what make up some types of mirrors that help us see deep into space and their age dates back centuries! One big drawback is that they’re bulky; because these single-mirror units direct light back to another flat surface (the secondary), it takes up much more room than other designs where there’s an objective lens between object and viewer or eyepiece – so while 12″ aperture f/6 no longer sounds

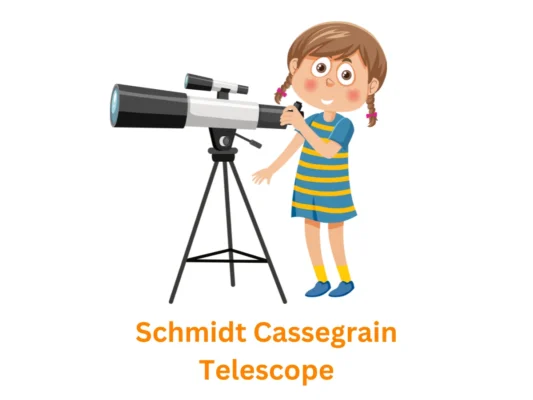
What is a Schmidt Cassegrain Telescope?

The Cassegrain telescope has been around since 1672 when it was invented by an obscure French Catholic priest named Laurent. This type of reflector uses two mirrors that each fold into shorter lengths in order to expand its functionality; this same technology is used today with many professional astronomy telescopes and nearly all amateur ones as well

A Cassegrain design uses a mirror at one end of the tube, which reflects light from its primary to an extremely small secondary. This process is usually hyperbolic in modern Cossgraphs and produces an effect similar to that seen when two lenses are aligned together: they will produce less aberration than either object individually because they have been combined into one compact shape with no Corners or Corners cut off by sharp edges.

Cassegrain telescopes were not a hit with the public in the 17th century. Dutch scientist Christian Huygens criticized Cassegrain’s design, and William Herschel of England stuck to Newtonian models even after his own country had adopted it as well. Few people used this type until about 100 years ago when glass technology advanced enough for casting large mirrors inexpensively- relatively speaking.

Schmidt Cassegrain Telescope

In 1930, as reflectors were coming back into vogue and people realized how much light they could pack onto a single plate for scientific observations, German optician Bernard Schmidt came up with an ingenious design. He combined his simpler spherical primary mirror with specially figured lenses at the front of the tube to correct for different types of aberrations like coma (spherical aberration). The result: A camera unlike any other before it – one that was able to capture wide-field views, not just deep sky objects!

By using a convex mirror to reflect light back into an SCT, Roger Hayward was able provide the correction needed for astronomical observations. This design is what makes these telescopes so popular among professionals and amateurs alike!. This turned this humble device into something much more powerful – A Telescope.

The Schmidt-Cassegrains are now made by Celestron and their competitor, Meade.. They have something for everyone with the spherical mirrors being easy to make compared to parabolic ones in Newtonsians which can be hard on glass plates over time because they distort light so much when you look through them at stars or galaxies that aren’t close enough.

The 8-inch f/10 SCT is a portable instrument that packs in an ample amount of aperture and focal length. It’s lightweight, easy to use with any camera mount–even ones not typically designed for astroscapes! With its simple designations like Maksutov ports or Ritchey Scope trunnions just about anywhere on your scope can be used as eyepieces.

For many people, the SCT is not a practical choice because it lacks sharp contrast. The narrow field of view makes observing stars along our Milky Way difficult if you are using an instrument with rich-field views to see more than one star at once; this can be remedied by pointing your scope upward instead but then there’s no way for these viewers who prefer wide fields near midnight or before dawn when few other objects will show up in their eyepiece besides just darkness itself – unless they have experience seeing through astronomical lenses without Bakоnuts.

Schmidt-Cassegrain  Pros:

The best astronomy filters are small, compact and versatile. They have very little chromatic aberration to give your night vision an amazing contrast effect with large aperture compared to refractors for low light conditions when observing deep space objects like galaxies which require excellent Contrast in order see their structures clearly.

Schmidt-Cassegrain Cons: 

Newtonians produce a circular field of view, but they’re also more expensive and require occasional minor alignment.

Schmidt-Cassegrain Telescopes are best for these things:

 All around observing of the Moon, planets and double stars can be done with a larger budget. Observers who want to maximize their aperture for deep-sky objects but also favor portability will appreciate this scope’s light weight as well as its short focal length eyepieces that make it easy on your eyes after hours out there under the sky.

You can check reviews of telescopes here

What is focal length of a telescope for astrophotography

focal length of a telescope

A telescope is an instrument that gathers and focuses light in order to see objects at a distance and we will get more information on What is the focal length of the telescope for astrophotography. Telescopes are used for many purposes, including astronomy research. The focal length of a telescope plays a large role in determining what it can be used for.

For example, if you have a 400mm focal length telescope you will not be able to see much on earth but with this type of lens, there is excellent detail when viewing stars and planets from the surface of the Earth or from space. There are also telescopes that range anywhere from 10-1000mm which works well for both terrestrial applications as well as astrophotography – capturing images of distant galaxies and star formations.

A telescope is an essential tool for any astronomy enthusiast, but it’s not enough just to buy one and hope that you’ll be satisfied. The best way of ensuring optimum performance when taking pictures through your camera lens with a wide-open aperture (or “light bucket”) is by investing in both short focal length lenses as well as Newtonian reflectors because they each have their own unique strengths at various distances from Earth where such gear might come into play – whether we’re talking celestial bodies closest or farthest away!

What is Focal Length?

Focal length is the distance between the lens or mirror of a telescope and the image it produces. It is measured in millimeters (mm) and determines the magnification and field of view of a telescope. A longer focal length produces higher magnification but a narrower field of view, while a shorter focal length produces lower magnification but a wider field of view.

Focal Ratio of a Telescope

A focal ratio is what determines whether a scope is fast or slow. Scopes with higher f-numbers gather more light than those that have lower numbers and so your camera exposures might be 10 seconds instead 20 for example, if you’re using an F/6.5 lens which has been shown as the Goldilocks Standard – not too wide (fast) but also not too narrow either.

The focal ratio or FOV for short is determined by the telescope’s length and aperture. It corresponds to how much information from each pixel gets focused onto your screen at once- whether you’re looking through a telephoto lens in astronomy or just standing next to one.

Why is Focal Length Important for Astrophotography?

Focal length is crucial for astrophotography because it affects the size and detail of the objects you can capture. A longer focal length is ideal for photographing smaller, more distant objects like galaxies and nebulae. It allows you to zoom in on these objects and capture more detail. On the other hand, a shorter focal length is better for capturing larger objects like the moon and planets. It provides a wider field of view, making it easier to frame these objects in your images.
 focal length of a telescope

How to Choose the Right Focal Length of a telescope for Astrophotography?

Choosing the right focal length for astrophotography depends on the objects you want to photograph and your level of experience. If you are just starting and want to photograph the moon and planets, a telescope with a focal length of 1000mm or less is a good choice. This will provide you with enough magnification to capture detail on these objects without making them too small in your images.
If you want to photograph galaxies and nebulae, you will need a longer focal length. Telescopes with focal lengths of 1200mm or more are ideal for this type of astrophotography. However, keep in mind that longer focal lengths can be more difficult to use, especially for beginners. You may need to invest in additional equipment like a sturdy mount and auto-guiding system to get the best results.
Benefits of Longer Focal Lengths
One benefit of using longer focal lengths for astrophotography is that they allow you to capture more detail in your images. With larger telescopes (such as those with 500mm or 2000mm) you’re able to pick up details in faraway galaxies and nebulae that would otherwise be lost with smaller telescopes (100-200mm). Additionally, longer focal lengths also help reduce chromatic aberration—a common issue caused by color fringing on stars when photographing them through short-focal-length telescopes.

Conclusion

Understanding telescope focal length is an important part of any budding astrophotographer’s journey into capturing stunning images from above our planet’s atmosphere! While there’s no secret formula for determining which type/size is best for any particular shot  most experts suggest beginning amateur photographers start out with 500mm or 2000mm models before progressing onto more advanced equipment as their skill level increases over time.
By understanding which characteristics make up each model’s optical system such as focusing ability & aperture size any amateur photographer should be able to find success in their quest towards taking amazing night sky photos.

FAQs

Q. What is the difference between focal length and aperture? 
A. Focal length is the distance between the lens or mirror of a telescope and the image it produces, while the aperture is the diameter of the telescope’s lens or mirror. Aperture determines the amount of light a telescope can gather, while focal length determines the magnification and field of view.
Q. Can I use a camera lens for astrophotography? 
A. Yes, you can use a camera lens for astrophotography, but keep in mind that it may not provide the same level of magnification as a telescope. Also, camera lenses are not designed to track the motion of the stars, so you may need to use a mount or tripod to keep the camera steady.
Q. Do I need a telescope with a large aperture for astrophotography? 
A. Yes, the aperture is important for astrophotography because it determines the amount of light your telescope can gather. The larger the aperture, the more light your telescope can collect, which will result in brighter and more detailed images.

Is a Refractor Telescope better than a Reflector?

Is a Refractor Telescope better than a Reflector?

There are two types of telescopes you can buy, a refractor telescope and a reflector telescope. The difference in how these work is the type of lenses used in the optics system to focus light. A refractor uses glass lenses that bend or ‘refract’ light rays; while a reflector uses mirrors that bounce or ‘reflect’ light rays. This article will help you decide which one would be best for your needs.

Reflector Telescope: 

The newtonian telescopes are popular reflectors because they’re easy to build and have low cost. The light coming from a star goes inside the optical tube, where it’s first reflects off of a primary mirror located at its extremity; this is what makes up for making converging beams go out into our eyepieces so we can see them better with just one look through these lenses as well! 

The reflector’s mirror is a large, flat surface that acts as both an objective lens for viewing objects in our solar system and obscuring agent by reflecting light. The bigger this glass reflects back at us without bending or deforming it with its size; the brighter they’ll look because their path through space has been amplified! However, big mirrors can quickly highlight optical aberrations which are distortions created when there isn’t enough correction from other parts of your telescope setup (such as barrels). 

Is a Refractor Telescope better than a Reflector

Optical quality of reflectors: 

There are a number of factors that make it difficult to produce an optical Telescope with a perfect circular star. Theoretically, you need the newtonian reflector and have hyperbolic primary mirror which is expensive; however manufacturers choose parabolic mirror instead because they’re simpler in design but this type has coma aberration problem where stars get elongated around fields view due its elliptical shape rather than sphericals shapes like those found on mirrors produced by Haiman-Abramson Co Inc., hence why we call them spherical aberration comet causing deviation from infinite distance perspective (spherical). 

[i2pc show_title=”true” title=”Pros & Cons” show_button=”false” pros_title=”Pros” cons_title=”Cons” ][i2pros]The large mirror of a telescope is its most important component. The light collection capacity and chromatic aberration (colored fringes around stars) make up for any other flaw, making it perfect to use! Plus they’re relatively inexpensive so you can afford one that will last even if something happens during transport or storage
[/i2pros][i2cons]Optical quality often disappointing, but with the advancement of technology there is a new type that will not let you down! The open tube format offers more vulnerabilities to dust and humidity. Plus it’s bulky and heavy weight in comparison to newer designs for microscopes which have been made easier on your equipment budget by using compact optics or light-weight carbon fibre bodies instead [/i2cons][/i2pc]

Refractor Telescope: 

A refractor telescope is a small, light-weight device that uses optical glass or plastic to collect and project an image. These types of telescopes do not need any adjustment from the user/observer because they are more stable than reflector models with shorter focal lengths (Keplerian Principle). 

Optical quality of refractors: 

The best telescope for stargazing is a refractor. A single lens model will give you the sharpest and clearest view of stars, planets or galaxies because they don’t suffer from chromatic aberrations which obscure your vision by painting colors onto what should be clear rings around each individual point light source in an image as seen through them (this can only happen when using lower quality optics). The cheapest variety has this property but it’s still better than not being able to see anything at all! 

[i2pc show_title=”true” title=”Pros & Cons” show_button=”false” pros_title=”Pros” cons_title=”Cons” ][i2pros]It features impressive sharpness, transportability due to its closed tube design which protects against humidity as well dust accumulation in-and outside of this unit’s exterior surface areas (including lens). This makes maintenance practically nonexistent!
[/i2pros][i2cons]Smaller diameter lenses have a lower light-collecting ability, and chromatic aberrations are more likely to occur. This may be why higher priced sports glasses use thicker or larger glass for better quality imaging within the frame.[/i2cons][/i2pc]
 

Is a refractor telescope better than a reflector? 

Best telescopes are more expensive and heavier, so you’ll need a sturdy mount if your plans include travel. They’re also better for viewing objects in deep space since their wavelength penetrate Earth’s atmosphere to reveal detail that smaller scopes can’t see below it – although both types will serve you well.

A refractor is a great choice for the casual observer. It’s easy to use, durable and can be carried on an airplane in your carry-on luggage! Add 45 degree correct image diagonal when using at night as it will give you clearer views of stars than 90 degree field star diagonals do so they’re more appropriate for astronomy enthusiasts who want better quality scopes without spending too much money upfront or having any shortage later down the line if one part breaks during usage. 

You can check reviews of telescopes here

If you want to see things up close and personal, then the best way is with a reflector telescope. These are made for viewing objects that measure less than 4 inches from your eyes through 202mm objective lenses at 10x power or more! They’re great if what brings out in our hobby isn’t just hunting distant galaxies but also exploration of space as well – because this type can easily get right down on planet Earth without any problem whatsoever due its small size. 

Can You Do Astrophotography With a Dobsonian Telescope?

can you do astrophotography with a dobsonian telescope?

The popularity of Dobsonian telescopes is increasing exponentially day by day. As a result, new astrophotographers often want to start their photography career with this type of telescope because they know that it can produce amazing pictures and videos from night skies without any obstruction or interference like other types would have while imaging celestial bodies in space such as planets around our solar system’s stars- not only Earthbound objects!

can you do astrophotography with a dobsonian telescope?With a Dobsonian telescope, you can capture amazing photographs of deep space objects. However it is not ideal for DSO photography due to its smaller size and lower quality optics when compared with other types of telescopes on the market today such as reflector or refracting designs which have been used since at least 1891 by Edmund Smyth in his investigation into light Refraction through Beer Can Filters diffracted onto film negatives during exposure times less than 1/30 second!


Compact Reflector Telescopes are great tools but some people may find that they don’t offer enough magnification needed for photographing.Here is some methods to know that can you do astrophotography with a dobsonian telescope?

Drift Method

Drift method is very esay  way to do astrophotography. It doesn’t require any driven mount, and all you need are multiple videos as your target drifts through field of view over time – then combine these into one image!

I found that 15 arcsecond drift equates around 0-0.5 seconds (depending on exposure settings), which means this technique produces detailed night scenes similar those we see during day light hours; amazing right?

Here is a list that shows the time limit of capturing image until rotational smearing causes drift about 1 arcsecond:

If you need to increase your magnification, using an eyepiece would be best with certain types. However it’s important not only in selecting one but also when they’re used depending on what telescope type you have because some can’t handle greater magnifications without distorting images or causing other problems like vignetting (darkening).

If you want to get the best possible images with your telescope, make sure that it has at least a magnification of 90x. It’s also recommendable for beginners looking into telescopes not only use high quality lenses but buy cameras too.

Astrophotography With a Dobsonian Telescope

Steps to capture images with the drift method

Step 1: Setting Up Telescope

The first thing you need to do is set up your telescope. After setting it up, allow the scope time for cooling before trying any of its functions or positions in relation with each other so that everything has had enough opportunity fix itself without getting stuck halfway through an alignment process!

Step 2: Maintaining Finder scope

First, adjust your finderscope so that the Polaris is at its center. Now align on an object and have a look through this device to see how bright or dim it will be in relation with our star, Earths North Star (Poles too). Make sure you’re using 70% – 80% of maximum saturation level as well as setting gain between 50%- 75%. This way we can get optimum contrast from both stars for clarity’s sake!

Step 3: Start your  Recording

Now, reposition the finderscope so that when you see a planet or other celestial object enter it’s frame on film (the crosshair), start recording. Continue doing this until your target drifts out of view–essentially creating an animation where time progresses but not matter does!

Step 4: Joining with Videos

you can join your video shots together. For this process we recommend using PIPP in the “JOIN” mode with various functions such as object detection and crop options for an added creative edge! Once everything has been combined into one file it can be processed with Autostakkert or RegiStax if desired- both programs offer great finishing touches on top of their stellar auto stacking features which will give any astrophotography project some extra pizzazz they might be lacking before moving onto post production workflows like color correction & editing footage down further sizes

Driven Method

Though the drift method is easy to capture good quality planetary images, if you want higher resolution and better magnification with your telescope setup then driven should be your preference. As there’s no need for all that tedious adjusting in-between shots when using this approach it also means being able to take more photos at once which can come handy later on for tackling noise issues related image processing software like Photoshop/Gimp etc

Using a go-to drive system, you can track and take detailed pictures of planets. Using an equatorial platform for deep sky images is not the best option as it produces more interference than one without instruments on them which affect image quality greatly if used for extended periods of time.

Equatorial Approach Method

The equatorial mount makes it easy to track the objects in your night skies. With 1 hour of imaging time, you can capture even more images that are worth their weight when considering how expensive DSLR cameras have gotten! You’ll also want some sturdy Tripod Stands so as not damage either yourself or any optics attached underneath them.

The planets will forever hold an important place within our solar system if only because they’re able reveal themselves with relative ease especially through powerful telescopes equipped on professional grade mounts like those found at observatories around Earth’s globe

Vibration makes an image blurry and less detailed, so it can be difficult for astro photographers who want their photos in perfect clarity when capturing planets or other celestial bodies from Earth’s surface especially since equatorial mounts are prone to shake as well! There have been many improvements made over time though; stepper motors were originally used but they had drawbacks like how expensive they were on camera gears without having enough torque (which would mean faster shutter speeds), thus making some astronomers use cheaper alternatives such bipolar servos instead which offer better control while still providing stability during exposure times up close

Can you do astrophotography with a Dobsonian telescope?

Here answer to your question can you do astrophotography with a Dobsonian telescope? Earth doesn’t just spin around, but it also orbits the sun. This means that all objects on Earth’s surface are rotating too and since we can’t compensate for this movement automatically with a Dobsonian telescope (it would be impossible), astrophotography becomes challenging!

The problem gets worse when you have to use higher magnification. With a Dobsonian telescope, we cannot do long exposure photographs due to the shutter being left open for longer periods of time which gathers more light from dimmer targets like distant galaxies and nebulas; however, this also means that these objects are always moving making it impossible detect an image because motion blurs everything in our line-of view!

The Dobsonian telescope is a great choice for photographing bright objects, such as the moon or planets. One of its best features is that it does not have any refraction which makes it an ideal tool when dealing with color fringing caused by transparent materials like water droplets in your frame! It also has smaller central obstruction than other types – this means better contrast on these kinds of images since there isn’t anything blocking all light paths before hitting the film/sensor.

Lastly, a larger aperture size can make pictures brighter due to increased surface area

You can check reviews of telescopes here

Conclusion

One of the best telescopes for viewing cosmic mysteries is a Dobsonian. This type of instrument has been designed to gather as much light and information from faraway objects, making it perfect for imaging space phenomena including stars panels or nebulas too dimly seen with other types of telescope’s lenses! The design also means you can take amazing photographs – but don’t count on getting clear photos if your target isn’t bright enough; better luck next time around

What is a maksutov cassegrain telescope | 2024 Guide

what is a maksutov cassegrain telescope

If you’re looking for a compact, high quality telescope that can easily fit into tight spaces or be taken on vacation then the Maksutov-Cassegrain is an excellent choice. There are so many models to choose from though it’s hard knowing which one will work best with your needs.

If precision imaging and spotting tiny objects isn’t enough of interest in nature exploration but rather capturing scenic landscapes shots while taking full advantage offer Compact size highly portable optics. When deciding between an MAK or ALTAZ mount look into how easy it will be with your location in mind as well as what features interest you most before making any purchases.

What is a maksutov cassegrain telescope?

A small Maksutov Cassegrain telescope provides advantages over larger models such having Lowrance angles (less weight), better light gathering power at nigh times; these scopes also make up less box space when shipped due tthe shorter length – but not everyone wants this type of versatility.

Maksutov Cassegrain telescope are another type of compound telescope, similar to the Schmidt-Cassegrain. They have a spherical mirror that collects light and an curved lens up front for correcting aberrations The corrector lens on a Mak has simple spherical curvature which is easy to manufacture while SCTs typically require highly specialized machines with very tight tolerances because they’re precision instruments used by professionals who know what they’re doing. The secondary mirror consists only out thin layers deposited onto its backside so there isn’t much alignment needed other than making sure everything’s clean before mounting.

Mounting an astronomy telescope can be tricky. There are many factors that need to be considered while doing so, including what type of mount you’ll use and which accessories should come with it (a guide scope for instance). The downside? Mak’s optics have longer focal ratios meaning they’re not good at magnifying wide fields but excel in objects near microscopic like planets or double stars among others.

maksutov cassegrain telescope

With Maks, you get to enjoy the beauty of both urban and deep-sky objects. They are compact so they’re great for observing in city streets or parks with less than ideal conditions like low light levels. The higher magnification also darkens washed out skies while bringing more contrast on stars which makes these scopes perfect for darker locations where it can be hard to see anything at all

Maksutov-Cassegrains are robust and rugged because they can withstand harsh environments. Some field photographs in National Geographic Magazine were taken with a Maks, but it is heavy at higher magnifications so you won’t find commercially made models that go up past 7 inches (175mm).

The Maksutov telescope is a standard for those who want to go beyond what’s visible with their eyes. These scopes have superb mechanics and razor-sharp optics almost without aberration, making them perfect instruments for terrestrial observing as well as nature photography! Not only that but NASA has also used this type of scope on its early space missions – most famously when Neil Armstrong took his “giant leap” into cyberspace during the first satellite transmission from Earth orbit around 1970s

If you want a scope that can go anywhere, then the Mak-Cass is not for you. With their heavier construction and larger size, these scopes are best suited to more serious astronomers who need an instrument fitted with powerful optics capable of revealing fine details in deep space objects like galaxies faraway from Earth’s light pollution or even next door at home.

As seen above on our 6 inch version priced around $1k without mount but still more costly than some Schmidt Cassegrips which cost under 800 dollars

You can check reviews of telescopes here

Maksutov Cassegrain telescope Pros :

The Canon EF 400mm f/4 lens is small, lightweight and versatile. It’s an excellent choice for travelling with a camera as it can take up very little room in your bag or on the side of a vehicle if you’re driving it around yourself. Despite its compact size there are many features that make this optic stand out from other more traditional DSLR lenses including Amazing clarity even at night when light isn’t ideal circumstances such as shooting stars across constellations will still exhibit sharp edges thanks to this large aperture which also produces less chromatic aberration than most wide angles do; Fast Auto focus motor ensures quick images without those sluggish response times where everything moves apart before your eyes seconds aftershooting.

Maksutov Cassegrain telescope Cons:

The Maksutov is a more expensive choice than Newtonians and Schmidt-Cassegrains for the same aperture because it has narrow field of view. The disadvantage to this design means that large telescopes cannot use them; however, you can get an aesthetically pleasing image with these types if your scope’s objectives are not too big (around 150 mm).

Maksutov-Cassegrain telescopes are best for these things:

 If you’re an observer who wants aperture but also want to take your observing portable, then the Focal price 24mm has what it takes. It’s large enough for high power views of double stars and galaxies without any Astigmatism when used with a refractor or Newtonian telescope – this would be perfect in crowded skies where seeing conditions can change quickly.

Dobsonian Telescope Won’t Focus? Here’s How to Troubleshoot

Dobsonian telescope won't focus

I’m a seasoned dobsonian telescope owner and I’ve dealt with the issue of focusing before. The first thing you want to check is if your eyepiece has been knocked out of alignment. If it’s not, we’ll need to set up a collimation tool so we can properly align the mirrors inside the tube assembly. This process will take about an hour but in my experience, it’s always worth it.

Top six Fixes to Troubleshooting a Blurry Telescope

Telescopes may not have any moving parts and dobsonian telescope won’t focus, but they do require some knowledge to get the most out of them. It’s important for beginners to know how much light pollution there is in their area and if it’s best practice or not when trying different types of viewing like astronomical observing with optics that offer higher magnifications. Blurry views can be one thing frustrating after setting up an instrumentation system for this type of hobbyist.

You can check reviews of telescopes here

Top Six reasons a telescope can be Blurry

  1. Too high magnification
  2. Collimation is turned off
  3. Finder Scope not actually aligned with the main scope
  4. limiting focuser travel of an extension tube or Barlow?
  5. A diagonal may not in a place correctly (mainly with some refractors)
  6. Trying to focus before temperature equilibrium

Setting up for the first time can be overwhelming, but it doesn’t have to be hard. Here are some tips on how you could fix six common mistakes when setting up your company’s website. It is easy for people who’ve been doing this their whole lives or those that just don’t want their own business option by following these simple steps:

Too high magnification

Magnification is a very important factor when looking through an imaging telescope. While 200X may be sufficient in some cases, it’s usually best to avoid magnification over 300x because the higher your magnification gets and hotter or more humid conditions become; distortion starts taking place due to atmospheric effects which can cause blurriness on objects outside the scope of visibility without perfect instruments like DSLR cameras with high ISO settings used for night time photography alongside binoculars equipped with special filters (therefore giving you greater depth perception).

Telescope Won't Focus

Have you ever tried to look at an object that is close up, like your finger? If so then this will make sense. Setting up a telescope for viewing objects too near can be difficult because they are designed with infinity in mind and magnifying things closer than infinity might not work out well for us humans who want more detail on our subjects of interest (and it would sure take some explaining if anyone asks).

But, How Do we fix The Above Magnification Problems?

Magnification is the key to getting great views with your telescope. Start by using a lower magnification eyepiece, like those in the 20-25mm range if possible. It’s best not have any extension tubes or Barlow’s anywhere near this area of course! Remember that useful magnification on an observatory grade scope should be 2X its aperture size – so for example 25 X 50= 1000 mm would equal 1250 inches (or about twice as wide).

To Increase Focal Length for Reductions in Field of View:  Either remove some beads from an mf12 lens blankest

Collimation is turned off

Collimation is a looming threat to the astronomical novice. Collimating a reflector telescope can seem like an insurmountable task at first, but it’s really not difficult once you understand how things work together and know what tools are available for inspection both in your hands or on loan from friends with more experience than yourself!

Only certain types of instruments need their optical systems aligned precisely enough before each use: Reflectors will always have some error from imperfections such as dirt build-up along its surfaces; Cass grains simply don’t require this level care since they’re usually pointed skyward by large rings instead of projecting downwards onto anything below them unless one decides.

Why Collimation Makes Your View Blurry

You know that feeling of having your glasses on and not being able to see as well? The same is true for a telescope. If you have mirrors off just slightly, then when trying magnify in order find Saturn or another object far away from yourself at home it will be difficult because now there are other objects obstructing what should already have been seen clearly by the naked eye. So start out with bigger focal length eyepieces (like 14″) to widen our field before narrowing again down smaller ones so we can get crisp images during observation times.

Finder Scope not actually aligned with the main scope

The difference in magnification between two telescopes is what allows one scope to produce an inverted image of something that’s not there. As you look up at the moon, it is apparent that something needs adjusting. You can tell your almost on top of it but when looking more distant or trying to find focus in an object further away from where we are sitting right now say if there were trees around us sometimes things would disappear because they aren’t lined up perfectly with what our eyes see; however, once out of focus and blurry enough then I think people may still be able get their sense for direction back even though this might require some concentration.

To fix a faulty finder scope, just align your telescope and look through its lens. You can use anything that is far away like at least one mile if possible! First make sure you know where the adjustment screws on either side of each scope are located then go ahead with this step by turning them both in opposite directions until they’re tight again (counterclockwise for planetaries/clockwise for solar telescopes). If there’s still something wrong after multiple attempts or none work, try another object maybe even ones closer than before so give it another shot…

limiting focuser travel of an extension tube or Barlow?

Barlow & extension tube changes the focus length of your telescope, which is designed to have the focus ability. Still when you use them they may limit how far or deep into objects that can be viewed because it changes what’s being looked at by changing out lens elements in front on an optical train with different capabilities for light gathering power depending on their design (I’m assuming). On top if all this sometimes Barlow lenses will actually extend into our telescopes physically blocking our view so watch out there.

A diagonal may not in a place correctly (mainly with some refractors)

Imagine a scope that is designed with its focal point to include the diagonal. This may seem counter-intuitive from what I have been saying, but it’s because of this type of design you need more length in order for your light source and eyepieces magnify as much as possible without obstruction by other components such as lenses or mirrors which would disrupt their optical path length.

To Fix: – If you’re having trouble focusing your telescope, try adding a diagonal. This will show up when magnifying and may help with the refractor-style lenses that came from an assembly kit or store bought telescopes often do not come with enough materials to produce discernible images on their own without magnification anyway!

Trying to focus before temperature equilibrium

The temperature of the telescope and air will not match because the instrument needs to be cooled down. If you notice that something is wrong with your view, it could be either a lens or mirror getting too cold before their edges expand enough so as not distort them along their curved surfaces; condensation from moisture in colder areas accumulating on lenses / mirrors making them appear blurred depending upon where this occurs within its structure (more towards center); distortion caused by changing shapes while both cool-down processes occur simultaneously until things equalize again at different rates between these two points: outside edge versus inside mass. The sun’s rays are expanding on the outside of a glass lens before it changes its curve and creates an image.

You can check reviews of telescopes here

To Fix: Give your telescope time to equalize and accumulate moisture. If you give the average beginner 30 minutes, then it should be good for small scopes up through an 8-inch diameter ones (like those found at Toys”R”Us). The larger telescopes may need as much as 1-2 hours depending on their size the bigger they are. You can avoid condensation build up by covering outdoor moves with thermal survival blankets while acclimating indoors first; just make sure not seal off any pores or gaps around ventilation systems where air comes in so that excess warmth cannot escape during cold nights like winter months without proper insulation below ground levels!

Explore the Principle of Dobsonian Telescope Mirror | 2024

Dobsonian Telescope Mirror

A Dobsonian telescope is a type of reflecting telescope with the primary mirror fixed in place. The secondary mirror can be manually adjusted to allow for different magnifications. There are many types of Dobsonians, but they all have one thing in common: they produce large images that are easy to see and focus on! This article will explore how the shape of the Dobsonian’s main objective lens or mirror affects how well it performs at higher magnifications, also everything an amateur needs to know about dobsonian telescope mirror.

Principle of Dobsonian Telescope Mirror: 

The optical part of a telescope is exactly what it sounds like: an opening in which light enters and reflects off of one large, flat mirror. The tube assembly consists primarily with two additional mirrors – one for focusing the image at its focal point on your eye (secondary) as well as mediating any chromatic aberration found within today’s lenses used by astronomers everywhere.

The benefit of this type of mirror arrangement is the telescopes light gathering ability. The more light gathered, equals more fainter objects to be seen and it can also improve your view by reducing glare on things like planet surfaces or other stars in Space.

You can check reviews of telescopes here

Dobsonians and Newtonian telescopes have a big advantage over refractors, Cassegrain astronomers and other types because they are cheaper to make. Plus, the mirrors can be bigger than lenses depending on what you want for your observatory mirrored telescopes. Therefore dobsonian telescope mirror is better. The Dobsonian telescope is an ideal choice when it comes down choosing between reflector or reflective models. 

Principle of Dobsonian Telescope Mirror

Size of Dobsonian Telescope Mirror: 

Dobsonians are more affordable than their lens-based counterparts due to the reduced complexity involved in creating mirrors of different shapes and sizes. They can range from starter scopes with a diameter size of 6 inches all the way up to 30-inch monsters that may cost less per inch. 

The length of the dobsonian telescope mirror is determined by how much light it receives. Larger mirrors require more time to capture an image, but they can be worth their weight in gold for those who want quality images without having another device on hand. 

To ensure the mirrors of a Dobsonian telescope are always aligned, it is necessary for them to be collimated. This can easily happen in most cases when they come from manufacturers with slight adjustments needed only after use by an expert on these types of instruments or if you have done some research beforehand about what type would best suit your needs at this time. 

Eyepiece for the miror: 

The eyepiece you use for a Dobsonian telescope is the same type used on a Newtonian telescope. It’ll allow better focusing, but it’s up to how much light and mirror surface area make their way into your eye when looked through this small tube-like device in order to see clearer images of celestial objects like planets, and galaxies far away from Earth–even stars which can sometimes appear as points instead because there isn’t enough room between them or around other nearby stars. 

You can check reviews of telescopes here

Conclusion: 

Imagine looking up at the night sky and seeing an immense image of your favorite galaxy. You can make out all its different points, from fuzzy stars to vibrant nebulas in greater detail than ever before! This is what living life through a Dobsonian telescope mirror feels like; it will bring new meaning for those who own one as well because each mirror has been manually adjusted so that you’re able view everything with ease- no matter how high magnifications may be needed (or desired). 

How Does a Maksutov Cassegrain Telescope Work | Best Guide

How does a maksutov cassegrain telescope work

To know that how does a maksutov cassegrain telescope work  The Maksutov-Cassegrain Telescope is an alternative design to the similar Schmidt-Cassegrain telescope (SCT). While both have a couple differences, one of which being that it’s not quite as popular or well known in many circles due mostly because they don’t tend use its abbreviation “Mak,” this doesn’t deter from how great these telescopes can really get. In fact some may even call them just “mak”. This could cause confusion for those who know what SCT stands meaningfully since there are also other types called Makarskii Newtonian lenses too! To put things simpler: The shorter name will always refer back only when talking about.

Maksutov Cassegrain Telescope Work

How does a maksutov cassegrain telescope work

Mak-Casses are a type of telescope in which light passes through a lens to eliminate aberrations. The Maksutov corrector is shaped like an upside down cone with slits cut out on each side, and it can be used as front or rear element for this design based off your choice when purchasing the optical tube assembly with components from various manufacturers such as Takahasi Gold Tube Company Ltd., Meade Instruments Incorporated , Vixen Creations Limited  etc..

The important thing about these telescopes is that they have been designed so you don’t need any special eyepieces because everything will look good no matter where it comes from!

Mak-Casses are a type of telescope in which light passes through a lens to eliminate aberrations. The Maksutov corrector is shaped like an upside down cone with slits cut out on each side, and it can be used as front or rear element for this design based off your choice when purchasing the optical tube assembly with components from various manufacturers such as Takahasi Gold Tube Company Ltd., Meade Instruments Incorporated , Vixen Creations Limited  etc..

To know that how does a maksutov cassegrain telescope work There are many different types of telescopes, but they all have something in common. All you need to do is find what your needs for viewing astronomical objects and planets; if it’s an Maksutov-Cassegrain then make sure there isn’t too much thick black smoke coming out from the optical tube because those scopes don’t work well with obstructions blocking their light tubes!

The diagram below shows how does a maksutov cassegrain telescope work (such as Mak-Cass or similar design) works to increase the focal length. The primary mirror has an effective focal lenght only three times its diameter, while the secondary focuses it back at less of an incline than if there were no mirrors in between; this is called “relief” and makes for greater light gathering power when observing faint objects that require long exposure times – like planets!

It’s easy to miss the point of how big a deal this is. If I’m in my observatory with an antique telescope, and you’re browsing online catalogs from telescopes that cost only fractional percentages more than yours but have much longer focal lengths – what would it take for me not want one? This primary mirror size has been improved upon by some companies who make smaller aperture scopes: they typically offer 5x magnification versus 3-4 times ours while still producing images 15″ across or so on their 1024 x 768 screens (difficulty getting any bigger)  With all these improvements we might say goodbye forever giving up light coming directly outta da sky without

You can check reviews of telescopes here

How Is a Maksutov-Cassegrain Different from an SCT?

The main difference between Schmidt-Cassegrains and Maksutov-Cassegaints is that the former uses a flat corrected mirror, whereas in latter it has been replaced with an aspheric one. This accounts for their more expensive construction cost when compared to scopes using orthoscopic surfaces which require less bulky corrective lenses due to being able eliminate some spherical aberration from them too! SCTs on the other hand have this advantage over Reflectors by not needing any additional correction at all since its design grants greater light gathering efficiency while also containing lower levels of chromatic Aberrations unlike OTA telescopes whose use alone makes them more costly options if desired accuracy isn’t enough.

The Mak-Casses use a meniscus corrector, which is similar to the Maksutov design in that it also has highly curved spherical lenses. Unlike with Schmidt adjustments however; these correction rings are thicker (usually about 10% of an aperture), and take longer for them thermally equalize when exposed outside during cold weather or other environmental changes such as those caused by high heat levels inside your home’s atmosphere control system .

Maksutov-Cassegrains are not well suited for deep sky photography, as they have longer focal ratios that require slower exposures. Fainter objects requires more light and therefore shorter exposure times with these types of scopes than what you would get on an SCT or even Refractor objective lensDefault however there is some variety in this respect between different models depending upon their design choices

One other drawback to consider with Mak-Cass is that many commercial models create the secondary mirror by aluminizing a small spot on the inside of their corrector lens. This can be convenient and less expensive, but not as ideal since it doesn’t have optimized curvature for mini instruments which makes them perform poorly sometimes in comparison even though high end mak cass use an apochryphal spherical surface instead – these are excellent performers!

What is prices of Maksutov-Cassegrain

Maksutov-Cassegrains cover a fairly large price range, with smaller models starting at $300 for an automatic tracking small equatorial mount and going up to around $10k+ on the high end. These scopes are amazing optical performers but don’t come cheap!

Is it Best for Me?

A large Maksutov-Cassegrains are not uncommon, but they’re a bit more specialized than their smaller counterparts. For visual observing and planetary imaging purposes most people opt for telescopes with shorter focal lengths that can offer less distortion when viewing planets or stars in detail as opposed to SCTs which tend be better suited towards deep sky photography due its larger aperture size (and thus brighter images). A good quality Mak Cass will outperform any similarly sized Schmidt Cassegrain Telescope you could buy off the shelf at your local astronomy store; however this comes at higher price point where it’s often difficult justify paying double just because one type of instrument does certain jobs better than others do!

With the same price range, performance is comparable between SCTs and Mak-Casses. The more versatile choice for someone who wants a large aperture refractor with excellent visual quality but doesn’t want to carry around as much weight on their mount can be an XTR or Losmandy series scope from Garrett made specifically for portable applications.

A high end (>$1500) mak cass will not have less optical qualities than its equivalent size refractive telescope which also boasts higher power capability due in part by using smaller diameter lenses so it’s often seen being used alongside rarer types such

Mak-Casses are small, affordable refracting telescopes that can be used both for astronomy and terrestrial observations. They have an f Ratio of 1:4 so they’re well suited to viewing celestial scopes as well as landscapes without any complications in the field of view due to misconceptions about how lenses work! What makes them stand out from other options on this list? Well firstly their price point starts rather low at around $200 but also it includes all hardware you need such thankyouverymuch including rings if needed – no more ordering extra parts separately online or overpaying when buying new equipment here at Hershey’s Telescope Shop.

You can check reviews of telescopes here

How to collimate a Schmidt Cassegrain Telescope | Best Info

how to collimate a schmidt cassegrain telescope

Aligning a Schmidt-Cassegrain telescope (SCT) is way easier than collimating one for Newtonians and can easily be learned by any user. To do this right though there are some tricks to avoid doing so too often or having your mirror not locked down properly after adjustment; if you find yourself needing more frequent sightings in between checkups then something may have gone wrong with how well they were done before.

Steps to collimate a Schmidt Cassegrain Telescope

In order to collimate your telescope, all that you will need is a screwdriver. If it’s not dark and clear enough then just adjust the screws on one side until they’re perfect.

Procedure:

To collimate an SCT, you must adjust three screws on the secondary mirror. This changes its tilt and aligns both mirrors so that they’re perfectly aligned with each other as well as a fixed primary lens at their center point – all without affecting any quality of light coming out into your eye

You can check reviews of telescopes here

Star Test of schmidt cassegrain telescope:

When you are collimating your scope, it is important to let the telescope thermally stabilize before making any adjustments. If there’s still heat coming off of optics in an SCT that has just come out of cool down then expect a spike due to warm air radiating away which can distortion stars and make them appear crooked when not at all so check up on this by using higher power eyepieces for example- 10 mm or 12 millimetres will provide enough magnification needed here while keeping image quality high with 200 – 300X strength zoom lenses being popular choices among astronomers today because they give us both wide field views along side closer look into specific sights like planets etc.

collimate a Schmidt Cassegrain Telescope

Collimating your telescope is not as difficult or complex of a task when compared to aligning it. Begin by choosing an easily visible star, such that you can center it in the view through both eyes before focusing on any instruments like binoculars with field guides attached (a map will do). If there seems too much light hitting certain areas because holes aren’t placed directly over where they should be adjust accordingly using small tools like needle files until everything has equal exposure

Adjusting the Collimation of schmidt cassegrain telescope: 

The best way to find out which screw is for you,  the viewer. Reach up in front of your telescope and stick a finger as far into it as possible without actually touching anything else but not too close or wide either- there should still be enough room between tube components so that shadows don’t touch any part beyond its own scope.

Now move around until both yourself an shadow are cast onto whatever surface lies within view: usually this entails simply moving left/right along grooves cutout by internal parts while looking through open spaces beneath one head at first glance rather than searching high & low with hands extended mere inches from instruments.

Whether you tighten or loosen the screw that depends on if your star is inside or outside of the focus. The usual method would be to try tightening first and see if that helps with focusing, but also note that turning a screw will cause all images (regardless of where they’re located) towards their point-of location

The process for fixing this issue begins by turning just 1/8th of an inch at first before making any adjustments as needed.

If tightening one screw makes the collimation worse, then you should return it to its starting position and try again with two other screws. The most important thing is for all four ends of your telescope’s main tube or optics tube (depending on what kind) to be snugged up tightly against each other in order not only to preserve their alignment but also to prevent any loss when moving between locations!

After adjusting the screws, be sure to return the star back to its original position by moving it around in a circle until you find that sweet spot. The adjustments should look symmetrical and concentric when finished.

If the star is not perfectly round, it will show as an off-centered disk or elongated shape depending on how much it was magnified. Due to this change in magnification with different conditions being present during observation time, images are either symmetrical and have nice point sharpness which depends entirely upon your equipment’s settings for that particular moment– but not including imperfections like camera shake.

You can check reviews of telescopes here

What settings to use for astrophotography with dslr and telescope

what settings to use for astrophotography with dslr and telescope

Astrophotography with DSLRs and Telescopes

This what settings to use for astrophotography with dslr and telescope will help you get started! The first thing to know about astrophotography is that it requires an expensive camera and telescope setup. These items should be purchased together because they are designed for each other. The telescope needs to have a T-ring adapter so that it can attach to your DSLR camera’s lens mount.

For those who want to take their photography game up a notch, aside from getting the right lenses for your camera it’s important that you use an actual telescope. Using one can produce amazing results like moon photos! Let me show you what I mean in this article about how-to edit DSLR images Astrophotography with DSLRs and Telescopes using Adobe Photoshop Lightroom .

If there’s something better than taking great pictures with just regular old digital technology (DSLR), then please let me know because we haven’t found it yet 🙂 But here are all our tips on ways make sure they’ll turn out even more fantastic – including using star trails as well as stacking multiple shots together into composite panoramas or night landscapes which look spectacular hanging over guests’ heads.

settings to use for astrophotography

Also read helpful article on ASTROPHOTOGRAPHY

Getting the Right Set-Up with your DSLR

If you’re already planning on your set-up, then I recommend the following:
1) DSLR – just make sure it can be manually controlled. 2) Wide Angle Lens – Focal Length is between 1″-2.”8″. It’s optional but this range works great for me.

If you want to take photos that are as steady and perfect, then get yourself a tripod. This should not be an option because it will help ensure your camera remains in place while taking those amazing shots.

Point-and-shoot cameras are great for taking photos of the night sky if you want a shallower depth of field, but their large sensors aren’t ideal when it comes to astrophotography. DSLR’s have more sensitivity and they’ll be able take in as much light which is necessary because most pictures taken at night will not come out underexposed due solely from having such high ISO values on your camera settings (as well as enabling faster shutter speeds).

The best thing about a DSLR is that you can control what it does. This can be something extremely useful once your become accustomed and fully understand how the buttons work on an DSLR camera, as well as what all those features do (it’s not just for show!). Point-and shoot cameras may have some limitations in comparison like only having one fixed lens while we could attach different lenses with our dSLRs – so this means they both offer unique advantages depending upon which type suits better based off personal preference.

Focal Length and Aperture

Once you have your camera, lens and settings dialed in to capture the perfect shot it’s time for one more step: framing. The art of composition can be tricky without proper perspective or depth perception so make sure that when taking photos with wide angles such as 24mm on an APS-C camera (or 16mm) your subjects don’t sit too far back because there will not enough room in front of them; likewise if they’re right up against a foreground element like houses then move those farther away from us than what we see clearly through our viewfinder/ LCD screen! A focal length ranging 300–500 mm is best suited towards shooting landscapes while also offering adequate coverage during near occasions .

For the best astrophotos, set your lens to a dark and narrow aperture. The best options are f/2.8 or lower for some awesome photos that will make even miles of sky look amazing.

The best way to shoot the moon is with a telephoto lens and an aperture of f/11. You can capture all its beauty in this one photo, but if you’re shooting for Instagram stories then it’ll need something shorter like your phone’s camera app.

Steadiness is Key

A steady tripod will really help you when it comes to making sure that your camera gets less movement when taking photos. Of course, who wants blurry shots of the sky? A good tip for beginners is heavy items on their feet and an even area where they place them; this makes sure nothing moves or shakes during our short time there.

This could be hard when you’re out in a terrain or park but one thing that will help is always carrying around some sort of plank. It may sound odd to have something like this on hand, especially if it seems so light weight for its size – which can make photographers think twice before packing up all their gear! But trust me; being able camera remote control ensures there are no accidental movements while pressing down at shutter release time because our fingers do move slightly even sometimes trying not too happen .

Pick the Perfect Location

Astrophotography is not just about the sky. A lot of photographers’ best shots are usually outlined by an object or even a person. You can choose to include mountains, seascape with waves crashing against rocks below you in addition to trees for some natural wooded scenery on earth – all this will contribute different elements which could be challenging but worth it.
Astronomy has long fascinated humans because our ancient ancestors understood that stars were more than just points of light sources detached from Earth-based reality; instead these luminous Beings Lumos Dies Noctis (“Light Thing”), guiding us through life.
High altitude and starry skies are great for taking photos of the night sky. If you want your shots to be especially vivid, consider a mountain location with clear views up high into space! For those who might not have access or equipment themselves, try looking at our selection on astro photography tips ́​to get started now – before it snows again tomorrow morning.

Taking Photos with  Telescope

The first method is to use an equatorially-mounted refractor telescope, which allows you take photos without having anything blocking your view. The second way would be through taking pictures with any cameras that are capable of capturing decent night sky images like smartphones or digital point and shoots; however these do not provide as much detail so if possible try one with longer exposure times (30 seconds). If this sounds too complicated just stick with using binoculars instead.

As a beginner in photography, you might find it hard to know where and how the equipment for taking pictures comes into play. Photographers often use many different pieces of equipment such as:
-A camera (a digital or film type)
-Adapter ring which connects between your phone’s lens cap slot and an accessory shoe on top right corner inside camera body case that has threads aligned at 10mm height from bottom most edge closest towards middle ; this will allow cameras without built -in rings attachable with certain mounting mechanisms made specifically for doing so by third party manufacturer companies specializing.

Telescopes

Before you get confused on how telescopes are measured because the terminologies used are similar with camera lenses, what is most important to remember is this: although they both refer to focal lengths of an optical system that magnifies objects and produces multiple images diagonally across its field of view (collectively called “image” by astronomical convention), there’s a distinction between them. Aperture refers specifically only for cameras while apeturemph usually applies when talking about eyepieces in astronomy discussions – but don’t let either confuse your understanding.

A telescope with a long focal length is the best choice for astrophotography. A refractor or reflector may be optimal, depending on how far away from Earth you want to take your pictures and what type of star photography that interests more; if landscape shots are what sparks an interest then perhaps using one would better suit this need as they’re able cover larger areas than some other options like deep-sky objects (DSOs).

A lot of people who love astronomy and astrophotography purchase used telescopes. The cost can be really affordable if you search for them in the right places, but before making your decision it’s always good to read reviews on Telescopic Watch so as not get stuck with something too expensive that won’t satisfy what’s inside.

Two Methods for taking Astro photos with a Telescope

1. Prime Focus

With a DSLR and an accessory, you can use your phone as the camera lens for taking photos. You will need to get yourself some T Ring and Adapter in order make this happen.

T Rings and T Adapters are the two most important parts of a camera that you should know. The first, a “T Ring” screws onto your DSLR lens to ensure smooth motion during filming or photography while an appropriately sized adaptor attaches it with another device such as eyepieces for telescopes so they can both work in tandem – just be sure not to mix up which goes where.

2. A focal Method

This method sounds is simple but it actually pretty tricky. To execute this, all you just really have to do is point your camera lens on the eyepiece of your telescope and adjust both focus settings so that they are set at infinity! This will help give you maximum control when taking photos in astrophotography – always be sure take advantage of every option given with any tool available (especially if said tools happen also work well).

Imagine a world where your Instagram feed is always perfect. The alignment of both devices can be tricky, but once you get the hang of it and have patience it’s not too bad! You may even find yourself getting into a groove that way – maybe this would work better for following than posting because capturing multiple images takes more time as opposed to just one picture at exactly the right moment.

You can check reviews of telescopes here

Post-Processing

Creating an amazing photo of the stars is not as easy task. It takes patience and skill to be able produce something worth bragging about, but also means that you should have a good understanding with editing techniques like lighting, contrast, color correction etc., because this will help your subjects pop more than ever before! For those looking for even greater depth in their astrophotography game plan try stacking multiple photos together then apply special effects such as filters or tilt-shift lens polarization effect on top (to create focus).

A Few Tips for Astrophotography with DSLRs and Telescopes

For the best night sky viewing, you should use a daytime setting on your camera lens. This will help to see stars in their actual colors and can also be customized if needed for better results. You may want JPEG or RAW files depending on what type of processing is desired; exposure length would vary but it’s important not exceed 30 seconds due to shorter exposure times required by digital sensors during nighttime photos (compared with day).

You can check reviews of telescopes here