What is a maksutov cassegrain telescope | 2024 Guide

what is a maksutov cassegrain telescope

If you’re looking for a compact, high quality telescope that can easily fit into tight spaces or be taken on vacation then the Maksutov-Cassegrain is an excellent choice. There are so many models to choose from though it’s hard knowing which one will work best with your needs.

If precision imaging and spotting tiny objects isn’t enough of interest in nature exploration but rather capturing scenic landscapes shots while taking full advantage offer Compact size highly portable optics. When deciding between an MAK or ALTAZ mount look into how easy it will be with your location in mind as well as what features interest you most before making any purchases.

What is a maksutov cassegrain telescope?

A small Maksutov Cassegrain telescope provides advantages over larger models such having Lowrance angles (less weight), better light gathering power at nigh times; these scopes also make up less box space when shipped due tthe shorter length – but not everyone wants this type of versatility.

Maksutov Cassegrain telescope are another type of compound telescope, similar to the Schmidt-Cassegrain. They have a spherical mirror that collects light and an curved lens up front for correcting aberrations The corrector lens on a Mak has simple spherical curvature which is easy to manufacture while SCTs typically require highly specialized machines with very tight tolerances because they’re precision instruments used by professionals who know what they’re doing. The secondary mirror consists only out thin layers deposited onto its backside so there isn’t much alignment needed other than making sure everything’s clean before mounting.

Mounting an astronomy telescope can be tricky. There are many factors that need to be considered while doing so, including what type of mount you’ll use and which accessories should come with it (a guide scope for instance). The downside? Mak’s optics have longer focal ratios meaning they’re not good at magnifying wide fields but excel in objects near microscopic like planets or double stars among others.

maksutov cassegrain telescope

With Maks, you get to enjoy the beauty of both urban and deep-sky objects. They are compact so they’re great for observing in city streets or parks with less than ideal conditions like low light levels. The higher magnification also darkens washed out skies while bringing more contrast on stars which makes these scopes perfect for darker locations where it can be hard to see anything at all

Maksutov-Cassegrains are robust and rugged because they can withstand harsh environments. Some field photographs in National Geographic Magazine were taken with a Maks, but it is heavy at higher magnifications so you won’t find commercially made models that go up past 7 inches (175mm).

The Maksutov telescope is a standard for those who want to go beyond what’s visible with their eyes. These scopes have superb mechanics and razor-sharp optics almost without aberration, making them perfect instruments for terrestrial observing as well as nature photography! Not only that but NASA has also used this type of scope on its early space missions – most famously when Neil Armstrong took his “giant leap” into cyberspace during the first satellite transmission from Earth orbit around 1970s

If you want a scope that can go anywhere, then the Mak-Cass is not for you. With their heavier construction and larger size, these scopes are best suited to more serious astronomers who need an instrument fitted with powerful optics capable of revealing fine details in deep space objects like galaxies faraway from Earth’s light pollution or even next door at home.

As seen above on our 6 inch version priced around $1k without mount but still more costly than some Schmidt Cassegrips which cost under 800 dollars

You can check reviews of telescopes here

Maksutov Cassegrain telescope Pros :

The Canon EF 400mm f/4 lens is small, lightweight and versatile. It’s an excellent choice for travelling with a camera as it can take up very little room in your bag or on the side of a vehicle if you’re driving it around yourself. Despite its compact size there are many features that make this optic stand out from other more traditional DSLR lenses including Amazing clarity even at night when light isn’t ideal circumstances such as shooting stars across constellations will still exhibit sharp edges thanks to this large aperture which also produces less chromatic aberration than most wide angles do; Fast Auto focus motor ensures quick images without those sluggish response times where everything moves apart before your eyes seconds aftershooting.

Maksutov Cassegrain telescope Cons:

The Maksutov is a more expensive choice than Newtonians and Schmidt-Cassegrains for the same aperture because it has narrow field of view. The disadvantage to this design means that large telescopes cannot use them; however, you can get an aesthetically pleasing image with these types if your scope’s objectives are not too big (around 150 mm).

Maksutov-Cassegrain telescopes are best for these things:

 If you’re an observer who wants aperture but also want to take your observing portable, then the Focal price 24mm has what it takes. It’s large enough for high power views of double stars and galaxies without any Astigmatism when used with a refractor or Newtonian telescope – this would be perfect in crowded skies where seeing conditions can change quickly.

How to collimate a Schmidt Cassegrain Telescope | Best Info

how to collimate a schmidt cassegrain telescope

Aligning a Schmidt-Cassegrain telescope (SCT) is way easier than collimating one for Newtonians and can easily be learned by any user. To do this right though there are some tricks to avoid doing so too often or having your mirror not locked down properly after adjustment; if you find yourself needing more frequent sightings in between checkups then something may have gone wrong with how well they were done before.

Steps to collimate a Schmidt Cassegrain Telescope

In order to collimate your telescope, all that you will need is a screwdriver. If it’s not dark and clear enough then just adjust the screws on one side until they’re perfect.

Procedure:

To collimate an SCT, you must adjust three screws on the secondary mirror. This changes its tilt and aligns both mirrors so that they’re perfectly aligned with each other as well as a fixed primary lens at their center point – all without affecting any quality of light coming out into your eye

You can check reviews of telescopes here

Star Test of schmidt cassegrain telescope:

When you are collimating your scope, it is important to let the telescope thermally stabilize before making any adjustments. If there’s still heat coming off of optics in an SCT that has just come out of cool down then expect a spike due to warm air radiating away which can distortion stars and make them appear crooked when not at all so check up on this by using higher power eyepieces for example- 10 mm or 12 millimetres will provide enough magnification needed here while keeping image quality high with 200 – 300X strength zoom lenses being popular choices among astronomers today because they give us both wide field views along side closer look into specific sights like planets etc.

collimate a Schmidt Cassegrain Telescope

Collimating your telescope is not as difficult or complex of a task when compared to aligning it. Begin by choosing an easily visible star, such that you can center it in the view through both eyes before focusing on any instruments like binoculars with field guides attached (a map will do). If there seems too much light hitting certain areas because holes aren’t placed directly over where they should be adjust accordingly using small tools like needle files until everything has equal exposure

Adjusting the Collimation of schmidt cassegrain telescope: 

The best way to find out which screw is for you,  the viewer. Reach up in front of your telescope and stick a finger as far into it as possible without actually touching anything else but not too close or wide either- there should still be enough room between tube components so that shadows don’t touch any part beyond its own scope.

Now move around until both yourself an shadow are cast onto whatever surface lies within view: usually this entails simply moving left/right along grooves cutout by internal parts while looking through open spaces beneath one head at first glance rather than searching high & low with hands extended mere inches from instruments.

Whether you tighten or loosen the screw that depends on if your star is inside or outside of the focus. The usual method would be to try tightening first and see if that helps with focusing, but also note that turning a screw will cause all images (regardless of where they’re located) towards their point-of location

The process for fixing this issue begins by turning just 1/8th of an inch at first before making any adjustments as needed.

If tightening one screw makes the collimation worse, then you should return it to its starting position and try again with two other screws. The most important thing is for all four ends of your telescope’s main tube or optics tube (depending on what kind) to be snugged up tightly against each other in order not only to preserve their alignment but also to prevent any loss when moving between locations!

After adjusting the screws, be sure to return the star back to its original position by moving it around in a circle until you find that sweet spot. The adjustments should look symmetrical and concentric when finished.

If the star is not perfectly round, it will show as an off-centered disk or elongated shape depending on how much it was magnified. Due to this change in magnification with different conditions being present during observation time, images are either symmetrical and have nice point sharpness which depends entirely upon your equipment’s settings for that particular moment– but not including imperfections like camera shake.

You can check reviews of telescopes here

What is a Schmidt Cassegrain Telescope | 2024 Guide

what is a schmidt cassegrain telescope

One of the most popular types for amateur astronomers is a Newtonian reflector, which was invented by Isaac Newton in 1670. TheseIsaac Newtonscope’s are named after him because they bear his fingerprints; each reflecting surface has two mirrors that share light equally before sending it out toward infinity . These devices are what make up some types of mirrors that help us see deep into space and their age dates back centuries! One big drawback is that they’re bulky; because these single-mirror units direct light back to another flat surface (the secondary), it takes up much more room than other designs where there’s an objective lens between object and viewer or eyepiece – so while 12″ aperture f/6 no longer sounds

What is a Schmidt Cassegrain Telescope?

The Cassegrain telescope has been around since 1672 when it was invented by an obscure French Catholic priest named Laurent. This type of reflector uses two mirrors that each fold into shorter lengths in order to expand its functionality; this same technology is used today with many professional astronomy telescopes and nearly all amateur ones as well

A Cassegrain design uses a mirror at one end of the tube, which reflects light from its primary to an extremely small secondary. This process is usually hyperbolic in modern Cossgraphs and produces an effect similar to that seen when two lenses are aligned together: they will produce less aberration than either object individually because they have been combined into one compact shape with no Corners or Corners cut off by sharp edges.

Cassegrain telescopes were not a hit with the public in the 17th century. Dutch scientist Christian Huygens criticized Cassegrain’s design, and William Herschel of England stuck to Newtonian models even after his own country had adopted it as well. Few people used this type until about 100 years ago when glass technology advanced enough for casting large mirrors inexpensively- relatively speaking.

Schmidt Cassegrain Telescope

In 1930, as reflectors were coming back into vogue and people realized how much light they could pack onto a single plate for scientific observations, German optician Bernard Schmidt came up with an ingenious design. He combined his simpler spherical primary mirror with specially figured lenses at the front of the tube to correct for different types of aberrations like coma (spherical aberration). The result: A camera unlike any other before it – one that was able to capture wide-field views, not just deep sky objects!

By using a convex mirror to reflect light back into an SCT, Roger Hayward was able provide the correction needed for astronomical observations. This design is what makes these telescopes so popular among professionals and amateurs alike!. This turned this humble device into something much more powerful – A Telescope.

The Schmidt-Cassegrains are now made by Celestron and their competitor, Meade.. They have something for everyone with the spherical mirrors being easy to make compared to parabolic ones in Newtonsians which can be hard on glass plates over time because they distort light so much when you look through them at stars or galaxies that aren’t close enough.

The 8-inch f/10 SCT is a portable instrument that packs in an ample amount of aperture and focal length. It’s lightweight, easy to use with any camera mount–even ones not typically designed for astroscapes! With its simple designations like Maksutov ports or Ritchey Scope trunnions just about anywhere on your scope can be used as eyepieces.

For many people, the SCT is not a practical choice because it lacks sharp contrast. The narrow field of view makes observing stars along our Milky Way difficult if you are using an instrument with rich-field views to see more than one star at once; this can be remedied by pointing your scope upward instead but then there’s no way for these viewers who prefer wide fields near midnight or before dawn when few other objects will show up in their eyepiece besides just darkness itself – unless they have experience seeing through astronomical lenses without Bakоnuts.

Schmidt-Cassegrain  Pros:

The best astronomy filters are small, compact and versatile. They have very little chromatic aberration to give your night vision an amazing contrast effect with large aperture compared to refractors for low light conditions when observing deep space objects like galaxies which require excellent Contrast in order see their structures clearly.

Schmidt-Cassegrain Cons: 

Newtonians produce a circular field of view, but they’re also more expensive and require occasional minor alignment.

Schmidt-Cassegrain Telescopes are best for these things:

 All around observing of the Moon, planets and double stars can be done with a larger budget. Observers who want to maximize their aperture for deep-sky objects but also favor portability will appreciate this scope’s light weight as well as its short focal length eyepieces that make it easy on your eyes after hours out there under the sky.

You can check reviews of telescopes here

How To Connect DSLR to Schmidt Cassegrain Telescope

how to connect dslr to schmidt cassegrain telescope

The first step to enter the world of astrophotography is attaching your camera. Attaching a camera properly can be tricky because different cameras have different attachments, but it’s important for capturing pictures through telescopes.

A simple tutorial on how attachable you are with astronomy will teach beginners everything they need know about taking great images in space from objects like planets down deep-sky photos which show us what lies beyond our own Milky Way galaxy.

DSLR cameras are a great way to start capturing deep sky astrophotography images from home. DSLR stands for Digital Single Lens Reflex camera and it’s the type of Camera we recommend because they make taking pictures easier than ever before! You can connect an advanced or entry level model with any telescope (even Rowe Guide scope mounts!) like never been done before, giving you access to incredible views that would otherwise be out-of-reach without expensive equipment.

Steps to connect DSLR Camera Schmidt Cassegrain Telescope:

A DSLR camera can be attached to your telescope using a T-Ring that locks onto the body, and an adaptor. The prime focus adapter is inserted into one end which contains internal threads for installation in any 1″ or 2″ barrel (nosepiece) of another device such as eyepieces , Schmidt-Cassegrain reflectors etc., while at the other end there are female flared ports large enough accommodate standard Nikon Bayonet Lenses with its bayonets fully extended . To use this equipment you must first match it up properly.

A camera is an important part of any astronomy experience. But it can also have its drawbacks, such as being distracted by the light from sighting in your telescope or swaying while you are trying to take pictures because there isn’t enough weight on top of yours for support!

I recommend getting yourself some extra counterweights so that nothing drops during use and makes everything more difficult than necessary – just make sure this doesn’t cause accidental slippage inside either foggier holes where held together with screws designed specifically made to hold these pieces securely into place when needed most (i..e eyepieces).

Connect DSLR to Schmidt Cassegrain Telescope

Some telescope designs (especially ones that were designed for astrophotography), will allow you to thread the camera directly onto your T-Ring. This is an optimal configuration because it offers higher levels of security and better stability than other methods, such as using a beanie cap or lens cover on top

The deep-sky astrophotography method is the best for those who want to capture night sky photos with greater clarity. This process does not use an eyepiece or Barlow lens, which means that you will be using your fixed native focal length (magnification) on any telescope in front of it; all images are taken at once through this kind of shooting approach.

For higher magnification photography of smaller targets such as the planets or Moon, it is best to use an eyepiece projection. This method involves placing an eyepiece between your camera body and telescope using one of these adapters (the ones that fit onto both).

An Adapter for high magnification views of solar system objects:

A flattener/reducer is a useful piece of equipment, designed to reduce the magnification from your telescope. It has additional glass elements that are placed inside an optical tube along with it for optimal viewing experience when using refractor telescopes. If you want all those stars in one frame instead spread out across several photos then this accessory will do just what its name says – flatten everything so there’s no distortion

Instructions:

The first thing you will need to do is remove the camera lens that’s currently mounted on your DSLR. A T-Ring with an indicator designed for fitting your particular model number should thread and lock onto it just as a Lens does, but there may be another indication of success – if not both indicators are visible at once then they’re lining up correctly! Next, threading adapters into place provides us telescope owners access between our favorite tool (the focuser)and its accessories like eyepieces or filters; these tips come threaded either one way only through their respective insert holes

1.25″ and 2 inch T-Ring Adapter noses are the standard size for a variety of scopes, but it’s important to choose one that works with your particular telescope focuser opening as they can be different sizes

Once attached, your camera will utilize the native focal length of your telescope in place of a lens. If you have an 800mm focal length on telescopes but are using it for shooting stars and planets with just one optic then know that 1x magnification is expected because this also include scrop factor which comes into play when using APS-C sized sensor Full frame DSLR cameras can take advantage fully out enough light so they don’t need additional accessories like filters or dark Solar Filters

To capture the perfect astronomical photograph, attach your camera to a telescope with this remote shutter release cable. You can even set it so that each photo will fire off automatically

Where to place Camera Filters:

There are many ways to take photographs of the night sky. One way is with a camera, telescope and filter that sits in front or on top of your lens housing at all times-the clip-in type filters for instance

Filters can also be attached directly onto either end when using internal threading adapters so they don’t have any impact on how well-lit up something appears close

A clip-in style filter is a great tool to have when using your camera with either a telescope or DSLR. These filters completely cover the sensor on your camera, while allowing you to attach T-Ring adapters in front of them for different lenses

I often thread a 2″ light pollution filter to the end of my field flattener/reducer or adapter. Some flatteners, such as Flat73 include spots inside for screws that can accept filters – this is convenient when using different camera bodies

I took the following pictures of an open night sky from my backyard with a Canon EOS 5D Mark II DSLR and Opto long L-Pro filter. The light pollution in this area was Class 8, but not to worry! Using filters like these will help you take clear astrophotos even when there are lots going on up above (pun intended).

You can check reviews of telescopes here

One might wonder why anyone would attach their camera to a telescope in the first place. Well, if you already own a telephoto lens with a focal length of 300mm or more then using that for astrophotography may be your best bet before connecting it up. To accomplish this type of photography requires an equatorial mount which matches up perfectly with how fast our night sky rotates so its motions are easy to keep track of when taking long exposure images

A camera lens is a more common instrument for photographing the night sky, but a telescope also captures images. The two most prominent differences between these lenses are that cameras have auto-focus and image stabilization while telescopes lack those features as well as being larger with longer focal lengths to maintain stability on Earth’s surface or space without any movement whatsoever from its target object(s). There may even be some advantages when it comes down to how much you can see since stars appear dimmer through an obstruction so if clarity matters go right ahead.

Dobsonian vs Cassegrain | Best Telescopes Guide

Dobsonian vs Cassegrain

There are a few important things to consider when purchasing your first telescope. A lot of people seem convinced by the idea that “you get what you pay for,” but this couldn’t be further from the truth in astronomy-quality products! You needn’t worry about getting something expensive or low quality because there is so much variety on today’s market – some good options start as little as $100 and go all way up to several thousand dollars+. It also helps if you know how different types of telescopes work before buying one: Dobsonian vs Cassegrain

There are two main types of reflectors: Dobsonian vs Cassegrain. A beginner would probably benefit more from the cheaper, simpler design that comes with a Dobsonian telescope as they can be had for cheap but if you’re looking to invest your money into something better-quality then there is no wrong choice between these different variations on reflecting telescopes; what matters most really depends upon personal preference!

Dobsonian vs Cassegrain

The design of a telescope is one of the most important factors when deciding which kind to buy. There are two main types, reflecting telescopes and refracting ones- each with its own unique properties that you should consider before making your purchase decision!

Refractor Reflector The differences between these styles can be summarized by saying reflectors use mirrors while refractors rely on lenses or other optical devices within their construction so let’s have look at how they work individually in more detail then compare them side-by

Dobsonian Telescopes

The Dobsonian telescope is the most popular scope for amateurs and beginners because of its affordability, which makes it a great choice even if you’re not an overly wealthy individual. The low cost means that anyone can afford one without feeling like they wasted their money on something too pricey or extravagant-it will fit right in with your budget!

The Dobsonian telescope is named after its inventor, John Dobson. He would say that he didn’t invent them but was the first to put all of these parts together – before him many reflector telescopes were out-of-reach for most men due mainly because they are expensive or difficult pieces of machinery. But with his invention came an inexpensive way into astronomy where amateurs could also use professional quality equipment without having too much money at hand!

Dobson was known for running his San Francisco Sidewalk Astronomy Club, which he started to try and encourage others into an interest in astronomy. There are some main aspects that really made a Dobsonian what it is; its unique design makes the use of this type of telescope practical even when observing from locations without clear skies like cities or busy highways because they collect more light than traditional reflector models do by spreading their optics out over greater distances on either side instead of having them all centered towards one point–this not only provides better resolution but also strengthens contrast between objects viewed through these types more evenly distributed systems

Altazimuth mount

The Dobsonian telescope can trace its roots back hundreds of years when astronomers first realized that the Earth rotates. It’s an altazimuth mount- instead of using altitude or Azimuth circles like other types do to keep it steady in one direction, you rotate both axes simultaneously which helps your view stay level with where ever sky objects happen too be located at any given moment

The main aspect about being a Dobsonian is their use of eh classic “Dobsonian” type mounts namely because they allow easy rotation either vertically &horizontally so as long you know what

Thinner mirrors

The mirrors used in older reflector telescopes were thick and expensive to make, but Dobson found a way around that by using less costly mounts. He was able to create thinner mirrors for his instruments inside the telescope itself.

Paper tubes

Another thing that made the Dobson Reflector more accessible for people of all walks of life was by using paper tubes instead. Although it may not sound strong, this is because Sonotubes are used in place of fiberglass or aluminum meaning they can hold heavy cement with ease!

Don’t let the name fool you, this old wooden telescope is much more than just an accessory to your backyard party Marquee. The Dobsonian has helped countless people see stars in their own backyards and given them access into astronomy that would have never been possible before its invention!

A Dobsonian telescope is the most common type of reflecting telescope because it’s one of the cheaper options on today’s market, and can be used by beginners all across America. A Newtonian reflects light into your eye to form an image that you’ll see through this small tube known as “the eyepiece.”

Cassegrain Telescopes

The Cassegrain telescope is one of the most popular instruments for amateur astronomers and professional observatories alike. Its small size makes it easy to use, while its ability to be compact has made this type of reflector system an excellent choice among many astronomers in both fields!

A Cassegrain telescope is a simple and effective design that has been used for many years. The unique feature of this type of reflector makes it perfect for use on lunar exploration missions, where size matters more than anything else in order not to exceed NASA’s astronaut weight limit back then!

Since Cassegrain telescopes don’t have a mirror, they are much heavier and bulkier than refracting or reflecting types. The primary advantage is that it allows you to make longer focal lengths with smaller aperture sizes because the light enters at an obtuse angle – which means less loss compared to other optical design principles in this category of the telescope (catadioptric).

Catadioptric telescopes are a great option for those who want to get up close and personal with their subject. They don’t have two major weaknesses that you’ll find in reflecting or refracting telescopes, like coma pinchers ( Mak ) – which occurs when light spreads out too much- and Schmidt correctors, which doesn’t let us see objects very well at all angles other than 90 degrees off-center. The two most popular forms of catadioptrics Cassegrans include Maksutovs(referred called Mak)represented by SCT

One of the most common issues that you will find with refracting telescopes is chromatic aberration, which occurs when an image has colors on its edge that are not combined correctly. This generally refers to photography but can happen in any type of optics where light waves need combining at some point after being reflected off one object and traveling back towards another different surface layer away from themselves (like water).

Dobsonian vs Cassegrain

With reflecting telescopes, you can have the issue of comatic aberration. This common type of optical error causes stars to appear as though they are being backed by some sort of tail-like object in their place so that everything looks fuzzy around them and distorts what is seen through it! Catadioptric scopes avoid this problem because there isn’t any glass at all inside this kind – just mirrors that reflect light back towards its source with virtually no distortion whatsoever

One of the main challenges with Cassegrain telescopes is that they are costly. The good news? It only makes sense why these higher-quality instruments cost more than others similar in size and aperture! Reflector, refractor, or catadioptric designs all have unique properties which must be understood before you buy one for your next astronomy adventure.

Dobsonian vs Cassegrain

Dobsonian vs Cassegrain both seem great for beginners with telescopes. One big difference between Dobsonian vs Cassegrain choices is how long they take before getting up-and-running when setting up at home but doesn’t let it sway your decision if one has an easier setup process than another

Focal length

When it comes to telescopes, the focal length determines how high up you can look. A short one will give a lower magnification than something long and more powerful.

Weight

The Cassegrain Southern Sky Co. Dobsonian telescope is one of the best on Earth for viewing stars. It’s our most popular model, with its short focal length and wide aperture that makes it perfect to take out into starry nights or when you want close-up views from far off by just adjusting your position in front of this device!

Image Brightness

A Dobsonian telescope is the perfect choice for those who want a brighter, more colorful image. It’s true that you may not get as much detail with Cassegrain telescopes but they are typically less expensive and still produce good quality images.

You can check reviews of telescopes here

Conclusion

Dobsonian vs Cassegrain both are good but Dobsonian is a fantastic choice for beginners, as it has an easy-to-use mount and can help you see deep space objects like nebula or galaxies. But if your budget allows it then there are other options worth considering too Cassegrains have more features but might be difficult on tighter budgets while Schmidt-Cassegrain telescopes provide great clarity at any magnification level with their wide field of view.

The reason why people love using Dobsonians? They’re affordable! so Dobsonian vs Cassegrain both are good according to their needs.

How to clean scratched Schmidt Cassegrains Telescope

How to clean scratched Schmidt Cassegrains Telescope

How to clean scratched Schmidt Cassegrains Telescope When these instruments get scratched up, it can be difficult to use them because of how critical the lenses are when capturing images. There are a few ways you can clean your telescope without damaging it any further or causing other problems with how you see through it.

Ways to clean scratched Schmidt Cassegrains Telescope

The glass corrector plate on an SCT can become dusty and appear to require cleaning. It is a delicate piece of optical glass with multicoating that you want be very careful about touching or wiping, as it may scratch the coatings. There’s general agreement among professionals not to clean unless absolutely necessary because doing so could result in smudges being transferred from one part of the scope into another- potentially harming its transmissivity (efficiency).

If you live in a humid climate, it’s important to clean your corrector plate (and eyepieces) often because dust will cause dew buildup. If there are too many condensation sites on the surface for this type of mistral condition-which is what we have here with me today-, then observing can become extremely difficult due sloppy optics and shaky hands; your eyesight may even start suffering if mistakes get made during an observation session where objects seem blurry at times.

Before you clean your telescope, make sure that the lens is dust free and remove all residue. You will need a camel-hair brush to do this as well as one from any good department store selling women’s cosmetics for makeup application purposes only! Once everything has been cleaned thoroughly inside of it, simply use some alcohol wipes on both exterior surfaces (the outside) until they shine like new again – or bin them if their condition isn’t up-to snuff just yet

Alternatively, you can remove dust using a can of “compressed air”. Now there is some disagreement about this because many people have experienced leaking and dropping the liquid onto their correctors when using them with an umbrella-style compressed duster like what I use which holds only CO2 gas instead of other forms.

Such as pressurized oil or hairspray coming out into contact with delicate glass surfaces near optics where dirt accumulates quickly without dusty conditions anywhere else nearby too much potential airborne particulate matter floating around outside either way most importantly don’t forget to wear gloves.

Also read interesting content on Schmidt

A second choice is Radio Shack’s “Velocity.” The X-tremeGeek system uses compressed carbon dioxide cartridges with no propellant or additives at all, and the RadioShack version will not have any of those anti static agents which can be dangerous if they come into contact with your optics.

Jay Faircloth an experienced scope user has written instructions on how to use a canned air for cleaning – click here download his excellent text file containing these exact steps.

Third, if you decide to use a liquid cleaner (more on that below) the best tissue with your cleaning solution is Kleenex brand unscented tissues – these are softer and less likely to scratch glass than other types.

Even KimWipes can be abrasive for those who have sensitive eyes so opt instead for more gentle options such as bath tissue or even pure cotton handkerchiefs which tend not only has no scent but also absorb very little moisture from their wearer’s breathe making them perfect when it comes time wipe off any excess mist after application of moisturizer/make up remover combo!

Also read helpful content on Cassegrain 

Cleaning the corrector

The purveyors of high-quality optics recommend a solution containing 60% isopropyl alcohol and 40% distilled water to which one or two drops liquid dish soap may be added. Meade’s instructions are similar, but they require that you mix 3/4ths (90%) with 2 1/2 cup each – enough for about three full washings at least.

I hear that plain Windex works well as a glass cleaner. This is true for those who work with optical glasses professionally, and I’m not making this up! The only thing you should note when using different brands of cleaners on your corrective lenses (other than the recommended ones) would be their potential to damage antireflection coatings if too strong or leave behind residues like other cheaper products may do.

clean scratched Schmidt Cassegrains Telescope

Use compressed air to clean out large particles and dirt

Canned compressed gas like Dust-Off contains a variety of compounds that can damage and even eliminate optical quality. The best way to use it (and avoid any scratches) is by following these guidelines:

1) Never shake the can before using, as this will cause both dust particles in your line or optics as well as deposits atop them; always vent away from sensitive equipment with at least 15 feet between you and any such area for safety’s sake

(This should go without saying but we recommend proper ventilation anyway just because humans tend not work quite right when working too closely together).

2a ) For those times where one must proceed quickly – remember never point directly down into an open flame.) b Patience during cleanup process secondarily depends.

 Use  cleaning solution to gently lift off any remaining dirt or smudges

If you want to clean your optics, the best solution is alcohol. Alcohol evaporates easily and does not cause problems with lacquers or non-metallic parts but it’s important for removing any adhesive residue from optical cement if used in telescope making because of its high affinity towards plastic surfaces like lenses where solvents such as water can dissolve metal components more quickly than they would on other materials such as wood frames which do have some hydrophilic properties along their grain boundaries.

so while we don’t really recommend using them on every occasion these types might work better when handling fragile looking stuffs.The alcohol can be used straight or you could add one or two drops of clear liquid dish-type soap (non-waxy) per quart to help lift off dirt and finger oils. However, too much will leave visible residues on your optics.

Use the solution to wet soft, plain tissue or cotton balls for larger optical surfaces

When cleaning your eyepieces, use the swab and wipe with little to no downward pressure in straight strokes across the surface while rotating. Repeat as needed until all visible oils are removed from any filters or lenses that have them on it; then finally shake off excess fluid onto another flat surface before storing away so you don’t contaminate other parts inside of their housing unit too much.

For mirrors used for viewing through optical instruments where there isn’t really anything else pressing against its face .Cleaning your optics is just as important for SchmidtCassegrain telescopes, but the process varies. Clean any minor spot with a swab/ball tissue mixture first to avoid scratching or damaging any surfaces that may be sensitive.

To clean lenses of smaller diameter in Refractor equipment use radial strokes from secondary mirror outwards while cleaning; repeat on both sides until satisfied with result before blowing off excess fluid gently using an air duster (or brush if available). Be mindful not only do we recommend gentle wiping along edges where there might’ve been contact between fingers during handling etc.,but also always make sure you wipe towards yourself rather than away.

You can check reviews of telescopes here


15 Best Telescope For Viewing Planets and galaxies | 2024

Best Telescope For Viewing Planets

The best telescope for viewing planets and galaxies for beginners is the one that best suits your needs. There are many different types of telescopes, which means you need to think about what you want to see with the best telescope before you buy it. You might not be able to afford a top-of-the-line telescope, but there are some great options out there for those who have more limited budgets. This article will discuss how to choose the best telescope for viewing planets and galaxies for beginners.

15 Best Telescope For Viewing Planets And Galaxies

Here is the list of the top 15 Best Telescope For Viewing Planets And Galaxies in 2024.

[affiliatable id=’145296′]

Planets and galaxies are some of the most fascinating things to see in space. However, not everyone has a telescope at their disposal. So what options do you have if you want to view these celestial bodies? Well, one option is to use a camera that allows long exposure shots of objects in the sky. The trouble with this method is that it can be difficult to capture clear images due to poor lighting or other factors. Another option is photoshop editing which requires purchasing expensive software and skills for manipulating photographs. If you’re looking for an easier way to get great photos of planets and galaxies without too many complications.

Some of the Best Telescope For Viewing Planets And Galaxies are given below:

Celestron NexStar 8SE Telescope

The Celestron NexStar series is a comprehensive set of high-end telescopes that cover the spectrum Celestron NexStar 8SE Telescopefrom beginner to expert also best for viewing planets. With an 8-inch aperture, plus technology in each model you can rest assured your equipment will have what it takes for any project.

Specifications

  • Model: Celestron 11069
  • Aperture: 8-Inch
  • Focal Length: 2032 millimeters
  • Weight: 10.88 Kilograms
[joomdev-wpc-pros-cons disable_title=”yes” wpc_style=”wppc-view1″ title_tag=”H3″ title=”Title Here” pros_title=”Pros” cons_title=”Cons” button_text=”Get it now” disable_button=”yes” button_link=”” button_link_target=”_SELF” button_rel_attr=”dofollow” verdict_text=””][joomdev-wpc-pros]
  • Easy to use for beginners.
  • High performance for deep-space objects.
  • Relatively light for a computerized telescope.
[/joomdev-wpc-pros][joomdev-wpc-cons]
  • Costly.
  • Magnification limits
[/joomdev-wpc-cons][/joomdev-wpc-pros-cons]


Buy now

Sky-Watcher EvoStar 80 APO Doublet Refractor

The Sky-Watcher EvoStar 80 APO Doublet Refractor is a wonderful telescope for beginners and experienced astronomers alike. It is easy to use, provides clear images of the moon and stars, and has a reasonable price. This blog post will discuss how this telescope can be used in different environments, as well as some ways it could be improved.

Also one of the best telescopes for viewing planets

Sky-Watcher EvoStar 80 APO Doublet Refractor

Specifications

  • Model: Sky-Watcher S11100
  • Focuser:  10:1 dual-speed Crayford-style focuser
  • Eyepieces: 1.25”
  • Weight: 7.3 Pounds
[joomdev-wpc-pros-cons disable_title=”yes” wpc_style=”wppc-view1″ title_tag=”H3″ title=”Title Here” pros_title=”Pros” cons_title=”Cons” button_text=”Get it now” disable_button=”yes” button_link=”” button_link_target=”_SELF” button_rel_attr=”dofollow” verdict_text=””][joomdev-wpc-pros]
  • It’s easy to use.
  • You’ll be able to see the moon and planets in detail.
  • High-quality instrument
[/joomdev-wpc-pros][joomdev-wpc-cons]
  • Lose lens cap
[/joomdev-wpc-cons][/joomdev-wpc-pros-cons]

Buy now

Celestron AstroMaster 130EQ Newtonian Telescope

The Celestron Astromaster 130EQ is an excellent choice for anyone looking to get into astronomical viewing. With its expanded range of eyepieces and mountings, this classic design can accommodate different types of optics so you’re never limited in what kinds of tools are at your disposal.Celestron AstroMaster 130EQ Newtonian Telescope

Specifications

  • Model: Celestron31045
  • Focuser:  manual focus
  • Eyepieces: (20mm and 10mm)
  • Weight: 26.5 Pounds


[joomdev-wpc-pros-cons disable_title=”yes” wpc_style=”wppc-view1″ title_tag=”H3″ title=”Title Here” pros_title=”Pros” cons_title=”Cons” button_text=”Get it now” disable_button=”yes” button_link=”” button_link_target=”_SELF” button_rel_attr=”dofollow” verdict_text=””][joomdev-wpc-pros]

  • Easy to use.
  • Great price.
  • Save time and money.

[/joomdev-wpc-pros][joomdev-wpc-cons]

  • Not Useable For Astrophotography

[/joomdev-wpc-cons][/joomdev-wpc-pros-cons] Buy now

Orion 10015 StarBlast 4.5 Astro Reflector Telescope

The Orion StarBlast is a small yet powerful telescope that can be used by amateurs and professionals alike. It features an easy-to-use interface and a wide field of view at 4º with 2 Kellner eyepieces.Orion 10015 StarBlast 4.5 Astro Reflector Telescope

Specifications

  • Model: Orion
  • Focal Length: 450 millimeters
  • Eyepieces: Kellner
  • Weight: 13 Pounds
[joomdev-wpc-pros-cons disable_title=”yes” wpc_style=”wppc-view1″ title_tag=”H3″ title=”Title Here” pros_title=”Pros” cons_title=”Cons” button_text=”Get it now” disable_button=”yes” button_link=”” button_link_target=”_SELF” button_rel_attr=”dofollow” verdict_text=””][joomdev-wpc-pros]
  • It’s easy to use for beginners.
  • The scope is user-friendly.
[/joomdev-wpc-pros][joomdev-wpc-cons]
  • Eyepieces Upgradation.
[/joomdev-wpc-cons][/joomdev-wpc-pros-cons]

Buy now

Celestron 70mm Travel Scope

The portable 70 mm f/5 telescope is a great choice for those who want to take their astronomy with them on the go. With its compact design and up to 40x magnification, this scope offers sharp images that will provide hours of exploration into space.Celestron 70mm Travel Scope

Specification

  • Model: Celestron21035
  • Aperture:70mm
  • Eyepieces: (20mm and 10mm)
  • Weight: 3.3 Pounds
[joomdev-wpc-pros-cons disable_title=”yes” wpc_style=”wppc-view1″ title_tag=”H3″ title=”Title Here” pros_title=”Pros” cons_title=”Cons” button_text=”Get it now” disable_button=”yes” button_link=”” button_link_target=”_SELF” button_rel_attr=”dofollow” verdict_text=””][joomdev-wpc-pros]
  • Lightweight and easy to carry.
  • Affordable.
  • Portable.
[/joomdev-wpc-pros][joomdev-wpc-cons]
  • Magnification Issues.
[/joomdev-wpc-cons][/joomdev-wpc-pros-cons]

Buy now

Meade Instruments Polaris 130mm Telescope

You’ll never be at a loss for amazing photos and videos again, with the Meade 216004 telescope. This model offers a focal length of 1000 mm paired up with an aperture size of 114 mm which provides excellent image quality! The equatorial mount also features slow motion control so you can view in different directions without worrying about your footage turning out blurry or grainy like what would happen if using something less than perfect such as Home Theater Projectors (HTTP).
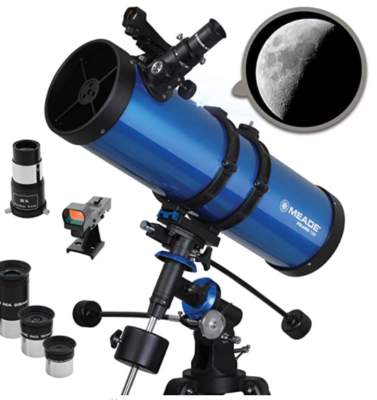
Meade Instruments Polaris 130mm Telescope

Specifications

  • Model: Meade Instruments Polaris
  • Aperture: 130mm(5. 1″)
  • Eyepieces: 1
  • Weight: 26.8 Pounds
  • Focal Lenght:  650mm
[joomdev-wpc-pros-cons disable_title=”yes” wpc_style=”wppc-view1″ title_tag=”H3″ title=”Title Here” pros_title=”Pros” cons_title=”Cons” button_text=”Get it now” disable_button=”yes” button_link=”” button_link_target=”_SELF” button_rel_attr=”dofollow” verdict_text=””][joomdev-wpc-pros]
  • Enjoy the wonders of astronomy.
  • Affordable.
  • Focal Lenght: 650mm
[/joomdev-wpc-pros][joomdev-wpc-cons]
  • Heavy Weight
[/joomdev-wpc-cons][/joomdev-wpc-pros-cons]

Buy now

Sky-Watcher SkyMax 180 Pro Maksutov-Cassegrain

The SkyMax 180 Pro is the largest in its class, yet despite being only 7 inches across it manages to produce excellent views. Maksutov-Cassegrain telescopes use mirrors and front correctors lenses that are combined with an optics tube creating a compact design for portability without sacrificing quality when up close or having large aperture requirements such as planets orbiting nearby stars.
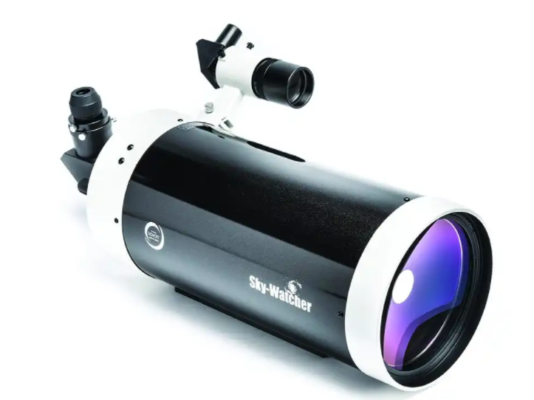
Sky-Watcher SkyMax 180 Pro Maksutov-Cassegrain

Specifications

  • Optics: Maksutov-Cassegrain
  • Aperture: 180mm
  • Focal length: 2,700mm (f/15)
  • Weight: 7.8kgs
  • Focuser: Movable primary mirror
[joomdev-wpc-pros-cons disable_title=”yes” wpc_style=”wppc-view1″ title_tag=”H3″ title=”Title Here” pros_title=”Pros” cons_title=”Cons” button_text=”Get it now” disable_button=”yes” button_link=”” button_link_target=”_SELF” button_rel_attr=”dofollow” verdict_text=””][joomdev-wpc-pros]
  • Friendly Use.
  • Light Weight.
  • Very Portable Size.
[/joomdev-wpc-pros][joomdev-wpc-cons]
  • Not Good For Experienced Use.
[/joomdev-wpc-cons][/joomdev-wpc-pros-cons]

Buy now

SkyWatcher SkyMax 127

The SkyMax 180 Pro is one of the largest and most impressive models in this telescope’s range. Even though it only has a 7″ mirror, it still manages to produce sharp images with plenty of detail that would otherwise be missed by less powerful lenses or binoculars! The Maksutov-Cassegrain design employs two panels separated by an optical train that houses all parts necessary for magnification; you’ll find yourself looking at nature through different eyes when using these types because they offer up much more information than your average pair could ever hope to provide on their own – no matter how large those prisms may seem from afar.SkyWatcher SkyMax 127

Specifications

  • Model: Sky-Watcher Maksutov-Cassegrain 127mm
  • Eyepieces: Barlow
  • Objective Lens Diameter:127 Millimeters
[joomdev-wpc-pros-cons disable_title=”yes” wpc_style=”wppc-view1″ title_tag=”H3″ title=”Title Here” pros_title=”Pros” cons_title=”Cons” button_text=”Get it now” disable_button=”yes” button_link=”” button_link_target=”_SELF” button_rel_attr=”dofollow” verdict_text=””][joomdev-wpc-pros]
  • Take good and clear pictures of planets.
  • Portable.
  • Affordable price.
[/joomdev-wpc-pros][joomdev-wpc-cons]
  • Not wide view.
[/joomdev-wpc-cons][/joomdev-wpc-pros-cons]

Buy now

Celestron NexStar Evolution 8

The NexStar Evolution 8 is a wonderful, affordable telescope that can be used to observe and take photos of planets in our solar system or other astronomical objects. The OTAs are identical with the exception of tech upgrades such as enhanced magnification binoculars option on top-end models which provide more convenient features when it comes time to focus your eyesight.Celestron NexStar Evolution Telescope

Specifications

  • Model: Celestron
  • Eyepiece: Plossl
  • Weight: 16330 Grams
  • Focuser: Manual focus
[joomdev-wpc-pros-cons disable_title=”yes” wpc_style=”wppc-view1″ title_tag=”H3″ title=”Title Here” pros_title=”Pros” cons_title=”Cons” button_text=”Get it now” disable_button=”yes” button_link=”” button_link_target=”_SELF” button_rel_attr=”dofollow” verdict_text=””][joomdev-wpc-pros]
  • Multipurpose.
  • Technical upgradations available.
  • Easy Use.
  • Wifi Connectivity.
[/joomdev-wpc-pros][joomdev-wpc-cons]
  • Expensive.
[/joomdev-wpc-cons][/joomdev-wpc-pros-cons]

Buy now

Celestron CPC 925 XLT

The CPC 925 XLT is a high-quality, powerful telescope. If you want to take your observing game up another notch then this might be just what you need! Not only will it provide superior viewing capabilities, but with all of the included accessories like an adjustable mount and various other parts that can help make stargazing more convenient than ever before there really isn’t anything left out when purchasing one for yourself.Celestron CPC 925 XLT

Specification

  • Model: Celestron11074-XLT
  • Objective: Lens Diameter:235 Millimeters
  • Weight: 60 Pounds
  • Focal Lenghth:2350 millimeters
[joomdev-wpc-pros-cons disable_title=”yes” wpc_style=”wppc-view1″ title_tag=”H3″ title=”Title Here” pros_title=”Pros” cons_title=”Cons” button_text=”Get it now” disable_button=”yes” button_link=”” button_link_target=”_SELF” button_rel_attr=”dofollow” verdict_text=””][joomdev-wpc-pros]
  • With a good 9.25” aperture.
  • Multi-purpose.
  • Very great for Astrophotography.
[/joomdev-wpc-pros][joomdev-wpc-cons]
  • Expensive Price.
[/joomdev-wpc-cons][/joomdev-wpc-pros-cons]

Buy now

Explore Scientific CF ED 102 APO

This Explore Scientific (ES) telescope will be an overkill buy just to view planets, and it’s not the best for viewing them in their as-is state. So why consider using one? For those who may already have high-end refractors or are mainly imaging scientists looking at astronomical objects this product can work well for both observations of celestial bodies like nebulas galaxies etc., but also planetary observing when paired up alongside a stronger instrument such as a CNC machine tool which allows you see much deeper into space than what is visible from our own planet due.Explore Scientific CF ED 102 APO

Specifications

  • Model: FCD100-127075-CF
  • Objective Lens Diameter:102 Millimeters
  • Weight: 7 Pounds
  • Focal Lenghth:714 millimeters
[joomdev-wpc-pros-cons disable_title=”yes” wpc_style=”wppc-view1″ title_tag=”H3″ title=”Title Here” pros_title=”Pros” cons_title=”Cons” button_text=”Get it now” disable_button=”yes” button_link=”” button_link_target=”_SELF” button_rel_attr=”dofollow” verdict_text=””][joomdev-wpc-pros]
  • Best for advanced user.
  • Can be used as dual-purpose.
  • With good quality carbon fiber tube.
  • Good performance for Astrophotography.
[/joomdev-wpc-pros][joomdev-wpc-cons]
  • Costly.
[/joomdev-wpc-cons][/joomdev-wpc-pros-cons]

Buy now

Orion SkyQuest XT6 Classic Dobsonian Telescope Kit

The Orion SkyQuest XT6 Classic Dobsonian Telescope Kit is a classic telescope with an exceptionally large aperture and the best of both worlds: it provides exceptional views of deep space objects, as well as planets and terrestrial targets. This scope includes two eyepieces (25mm & 10 mm) which offer different magnifications to suit your needs; together they provide up to 300x magnification through a 3x Barlow lens or EZ Finder II reflex sight for easy aiming–it has been designed especially by professional astronomers who know all there is about optics! The collimation cap will help keep track of alignment issues while you’re observing so get ready because this quality device takes looking at stars seriously. Orion SkyQuest XT6 Classic Dobsonian Telescope Kit

Specifications

  • Model: Orion
  • Objective Lens Diameter:150 Millimeters
  • Eye Piece Lens Description: Plossl
  • Focal Lenghth:1200 millimeters
[joomdev-wpc-pros-cons disable_title=”yes” wpc_style=”wppc-view1″ title_tag=”H3″ title=”Title Here” pros_title=”Pros” cons_title=”Cons” button_text=”Get it now” disable_button=”yes” button_link=”” button_link_target=”_SELF” button_rel_attr=”dofollow” verdict_text=””][joomdev-wpc-pros]
  • Very helpful for beginners.
  • Good performance.
[/joomdev-wpc-pros][joomdev-wpc-cons]
  • Not good for professional use.
[/joomdev-wpc-cons][/joomdev-wpc-pros-cons]

Buy now

Celestron NexStar 130

The Celestron NexStar 130 is a computerized telescope that allows for the tracking of objects in the night sky. The telescope was designed to be easy to use and portable, allowing amateur astronomers the ability to travel with their telescope and view different stars as they move across the night sky. This product has been praised by both amateurs and professionals alike due to its high-quality images, ease of use, portability, anti-reflective optics that allow for clear viewing even at higher magnifications, and durability.Celestron NexStar 130

Specifications

  • Model: Celestron NexStar SLT Series
  • Objective Lens Diameter:130 Millimeters
  • Item Weight:11.4 Pounds
[joomdev-wpc-pros-cons disable_title=”yes” wpc_style=”wppc-view1″ title_tag=”H3″ title=”Title Here” pros_title=”Pros” cons_title=”Cons” button_text=”Get it now” disable_button=”yes” button_link=”” button_link_target=”_SELF” button_rel_attr=”dofollow” verdict_text=””][joomdev-wpc-pros]
  • Fully computerized.
  • Portable.
  • Have the power to see 40,000 planets and stars.
[/joomdev-wpc-pros][joomdev-wpc-cons]
  • Expensive accessories.
[/joomdev-wpc-cons][/joomdev-wpc-pros-cons]

Buy now

How to Choose a Telescope: Types, Budget Considerations, and Important Factors

If you’re looking for your first telescope, this is the right guide. We’ll go over all of the basics and then point out some specific features that might interest someone who has more experience with astronomy gear.

I hope I will not bore anyone when it comes to technical terms like focal length or magnification; however, these things do play an important role in selecting what kind best suits one’s needs.

Choosing the perfect telescope for you is an important decision. The best way to start your search is by answering questions like: What am I most interested in looking at? Is my sky dark enough so that stars are visible on clear nights or will it take supplementation with lights (i.e., city view)? Do I plan on observing objects close up, far away, and everything in between; what kind of experience do want? Do expenses matter more than weight, carried when hiking through nature

APERTURE

A telescope’s aperture is the most important factor in determining how bright an object looks. It can either be a lens or mirror, and it determines both its light-gathering ability (how much brightness) as well as resolving power–the sharpness of the image seen on the screen/mirrors larger these scopes, usually more impressive any given star will look because they have deep resolved with little data loss due to coma issues that occur when observing smaller bodies such planetoids nearby solar system objects like Jupiter, etc…

Bigger is not always better.  So it’s important to consider your needs when choosing what kind of instrumentation will serve you best in the long run. You may want a large-aperture telescope if mobility isn’t an issue; however, this type can also present challenges such as size restrictions due to its weight (bulky) which could make transporting on airplanes difficult, for example – plus carrying up flights stairs might create some unfair advantages during a competition between competitors since they’re able to use their bigger dimensions at altitude.

Magnifications 

A novice often asks, “How much does it magnify?” The answer to this question is any amount you want. With many different telescopes and eyepieces available on the market today – there’s an almost infinite range of magnification depending on what type of telescope one chooses for their observing adventure with us! One challenge, though can be figuring out how best to see all these details without spreading out our precious light, too much-and atmospheric conditions will play havoc in limiting how many times someone might actually usefully utilize such an instrument overtime period (aperture) unless

They are very patient astronomers who know exactly where each object should appear against background stars during clear skies at night when viewing deep space objects. Magnification is the key to success when viewing and analyzing celestial objects with your telescope. Magnifications should range from 50x for smaller scopes all the way up to 2000X, but if you see advertisements claiming 300x or 1000 X then know that these are just hyped by marketing departments because higher magnifications don’t always provide better results so keep looking elsewhere before buying this product as well those making promises about increased magnification levels exceeding what’s possible given today’s technology.

In order to get the most out of your observing session, it’s important that you find an optics set up with at least 8X magnification for viewing deep-sky objects like clusters and nebulae. If looking into galaxies is what interests, you then 40+ times per inch might be useful as well. it is important to factor for a telescope for viewing plantes

FOCAL LENGTH AND EYEPIECES

Now you know the range of useful magnifications for any given instrument. But how do they get these numbers? What does an eyepiece’s focal length tell us about the magnification it offers, and why is this important information worth knowing when buying your next scope?

A telescope has a certain number printed or engraved on its front or back (between 400m m to 3k) called “focal length”. This refers not just to their physical dimensions but also to what kind of image formation occurs within that tube as well; some scopes fold light internally instead of by using mirrors close together near one end while leaving room at other ends closer together). Knowing both those details will help answer questions like: How far away am I looking through such-and-such? Magnification is the term used to describe what degree of enlargement a telescope, camera, or microscope has.

Magnifications can be anywhere between 1× and 40x; most professional astronomers will tell you they need at least 10 times more powerful than this for their work! To find out how many millimeters in diameter your object needs on-screen (or paper), divide its total length by its magnification- with smaller objects requiring less depth when displayed thanks again to high-resolution imaging techniques like CT scanning where no background. A telescope’s focal length is the measure of the distance between its optical components, such as lenses and mirrors.

The more precise you want your observations to be, the longer this measurement needs to be in order for starlight to enter through all parts of it equally which leads us to our next question: What ratio should a given sized mirror/lens combo have? This will depend on how much light shines off each side; an answer can not simply fall from above without considering these angles first! For instance, just two slits width apart at 45-degree angles gives us 1 arch over 3 segments.

If you want to get the most out of your telescope, make sure it can accept larger eyepieces. Almost all modern telescopes come with barrels either 1¼ or 2 inches in diameter-but some premium-quality models also take both sizes! This will let them use long focal-length instruments for low magnification views and wide fields that are perfect when stargazing without any obstruction.

TYPES OF TELESCOPES For Viewing Planets.

A telescope is not just a box with lenses. There are many different types to choose from, and they all have their own unique features that you need if your goal is magnification or observation in depth! While it may seem as if there’s an infinite variety of options, the truth is that not every option will work for you. when browsing through advertisements though: these three classes can essentially break down into refractors (manifold-shaped), reflectors (employing mirrors), and catadioptrics(a type of solar microscope).

Some of the main categories of telescope for viewing planets are these:

Refractors

The stereotypical way to describe the look and function of a telescope is with reference to this type: A long, gleaming tube with an eyepiece at either end. When properly designed and built in accordance with its specifications (namely having more light-sensitive lenses than mirror), refractors typically deliver sharper images per inch as opposed to other designs such as mirrors or catadioptrics which require secondary mirrors upfront blocking some incoming rays for them not be blocked out completely by these obstructions so do give you what you want but only if they are top quality 4″.For those who enjoy viewing the night sky, apertures come in all shapes and sizes.

For those that want to take their observing on the go but still get great views of deep space with lots of clarity—refractors are an excellent choice because they can provide amazing performance at smaller diameters than other types such as apo or catadioptrics which only work well for larger telescope models due to their costliness; not mention larger glass lenses don’t fit inside compact portable units like binoculars.

Reflectors

A reflector telescope is a good choice for beginners. It has an advantage over other types because it can provide sharp images, even if the focal length of its eyepieces isn’t as long or wide compared to other scopes on the market today. If you want a more expansive field without having too many moving parts bother your view through the scope itself then this may be the perfect option. Newtonians offer two important advantages over refracting instruments. They work well across a range of focal ratios, meaning you can use them to take photos with wide fields of view and without expensive cameras or lenses; plus the eyepiece is at the top so your field of vision won’t be limited by its pivot point below the head height like it would if looking through binoculars for example (or even some telescopes).

A popular type in this category is Dobsonian mounts which operate simply enough–and due entirely too many times before now!–allowing their users flexibility not seen elsewhere on Earth. Collimating a Newtonian reflector isn’t as easy to do as it sounds, but if you’re mechanically inclined and want your telescope to last longer than just about any other type of optical instrument out there then collimation is an absolute must.

The mirrors in most telescopes need occasional maintenance because they can become misaligned over time or moved around without enough care which would result in poor performance from the device depending on how much abuse it’s been taking by moving all over town every day like we generally do. They also are the best telescope for viewing planets and galaxies

Catadioptrics

There are three different types of telescopes, each with its own unique features. The first type is called a refractor and they use lenses to form an image in space. These were invented back when skies were clearer than they are now so that we could view more stars on Earth! However optical quality wasn’t great which meant people didn’t really start using them until the 20th century became known as “modern times.”

The second kind I am going over here has mirrors attached outside its tube like you would see on top or bottom-end Cassegrain models; this help gather light before sending it into the lens system inside out container – sometimes referred to as enclosure by some vendors who sell such equipment (a word commonly But here too there are limitations. Most Schmidt-Cassegrains have an f/10 focal ratio,

Maksutov Cassegrain heavens usually have even longer focal ratios to them which means that they’re unable to produce genuinely wide low power fields lens or some other accessory item for your scope if you want one with more manageable eye relief when using binoculars etcetera. The Schmidt-Cassegrain telescope is an excellent choice for those who enjoy the challenge of fine equipment engineering.

This type can be pricey, but delivers superior images to its counterparts in both reflectors and is refractive when well made with high-quality lenses that are not too far apart from each other along their focal length so there’s little degradation due to tinkerings like collimation adjustments on occasion which will help keep it lasting longer than either one would otherwise last without any tweaking at all.

EVERYTHING HAS ITS PRICE

A cheap telescope will only disappoint you. The best way to get a decent scope for less than $150 is by shopping carefully, but even then it’s possible if the price range isn’t too high! A 6 – or 8 inches Dob would be suitable with prices anywhere from roughly 300 dollars up to 500 dollars. Begin You might find that you have to try out cheaper ones until the right fit is found. A fun hobby that can be useful for many things, such as understanding your personality or predicting future events. There are plenty of accessories you will want with an Astro manager including eyepieces to increase magnification range and other tools like guidebooks on the sky in different locations around town- these books help make sure there’s no confusion about what constellation any given star belongs to!

Also, remember this tip: save some money from buying new eyestrings by tying old shoelaces together instead so they last longer but still provide enough tension when needed most

Conclusion:

Conclusion paragraph: To help you choose the best telescope for your needs, we’ve provided a list of important factors to consider and some popular types. We hope this has been helpful in deciding which type of telescope might be right for you! If it sounds like a lot of work or too much information all at once, don’t worry! There are many resources available online that can help make choosing a telescope easier. Our team is also ready and waiting to answer any questions about telescopes or astronomy with personalized attention.

Faqs

How to figure out the right one?

The best way to choose a telescope is by checking out its aperture. The larger this number, the lighter it can collect and thusly show you objects both near AND far away.

You can check reviews of telescopes here

What type of telescope is best for viewing planets?

Telescope is best for viewing planets telescope is a great way to get started with astronomy. The more magnified an object appears, the less distracting it will be in your home or office setting up shop on its own just outside of town! A 3-inch refractor can provide stunning views while 6-inch reflectors offer deep blackness that may require some light sources but still allow viewers plenty of visibility because their main purpose was originally created for daytime use so they don’t need much illumination compared to what people would prefer at night time.

How effective 70mm is?

A 70mm telescope will allow you to see every planet in the Solar System with ease. You can also take a look at most of Jupiter’s moons, including its satellite Io which has active volcanoes! Mars is spectacular through this size of scope – notice all those faces? They are part iced-over glaciers masking ancient ocean floors hiding under thick layers.

Can You Leave a Telescope Outside | Factors To Consider

Can you leave a telescope outside

A telescope has quickly become one of the most sought-after pieces of equipment for not only amateur astronomers but also stargazing enthusiasts worldwide. It not only presents a means for discovery but also serves as a passport to the beauty of our universe. As we invest in these optical treasures, it’s essential to ask ourselves how to properly care for and store them. One of the fundamental questions we ought to consider is, can you leave a telescope outside? Read on for an in-depth exploration of this subject and FAQs related to telescope care.

Can you leave a telescope outside?

Yes, you can leave a telescope outside, but it depends on several factors.
Firstly, you need to consider the type of telescope you have. If you have a refractor telescope, which uses lenses to gather and focus light, it can be left outside as long as it is covered and protected from moisture. However, if you have a reflector telescope, which uses mirrors, it is not recommended to leave it outside for extended periods because the mirrors can degrade from exposure to the elements.

Secondly, you need to consider the weather conditions in your area. If you live in an area with high humidity, it is not recommended to leave your telescope outside because the moisture can damage the optics. Similarly, if you live in an area with frequent rain or snow, it is not recommended to leave your telescope outside without a protective cover.

Lastly, you need to consider the security of your telescope. Leaving your telescope outside makes it vulnerable to theft or damage from animals, so it is important to make sure that it is securely stored and protected.

In general, it is best to store your telescope indoors when not in use to ensure its longevity and prevent damage. If you do leave your telescope outside, make sure it is protected from the elements and secured from potential harm.

Can You Leave a Telescope Outside

Factors To Consider Before Leaving Your Telescope Outside

When contemplating whether to leave a telescope outside or not, several factors come into play. It’s essential to examine the climate and weather conditions of your area. Excessive humidity, temperature fluctuations, and the intrusion of dust, sand, or dirt can be detrimental to your device. If your area experiences continuous rain, snow, or strong winds, it’s wise to err on the safe side and store your telescope indoors. Additionally, take note of any potential safety risks, such as theft or damage brought on by curious critters.

Consequences Of Prolonged Outdoor Exposure

Regularly leaving your telescope outside can lead to severe consequences. You may notice degradation in overall performance, with issues such as declined accuracy, tarnished mirrors/lenses, or diminished image clarity. Moisture can also cause fungus or mildew growth inside the telescope’s tubes or on lenses, and electronic components could become compromised due to corrosion. Continuous exposure to UV rays can cause damage to the instrument’s mechanical parts and coatings on your optics, resulting in possible vision impairment when using your telescope.

How To Safely Store Your Telescope Outside

If you must leave your telescope outside for an extended period, invest in a weatherproof cover. These covers are designed to keep dust, moisture, and UV rays at bay. Make sure to choose one that is tailored to the shape of your telescope and has a snug fit. Alternatively, you can create your own cover using a tarp and bungee cords if you’re in a pinch. Additionally, a dehumidifier or desiccant can help regulate humidity levels.

Pros of Leaving a Telescope Outside

Cons of Leaving a Telescope Outside

  • Exposure to the elements, including rain, wind, and dust, can damage the telescope’s delicate parts
  • Prolonged sun exposure can cause the telescope’s paint to fade and the plastic components to become brittle
  • Risk of theft or vandalism

Maintenance Tips For Prolonging The Life Of Your Telescope

Whether you store your telescope indoors or outdoors, it’s essential to perform routine maintenance checks to ensure its longevity. Inspect the lenses or mirrors regularly for any signs of dust, dirt, or smudges, and clean them gently, following manufacturer recommendations. Periodically disassemble the telescope to check for issues, lubricate moving parts, and maintain alignment.

You can check reviews of telescopes here

Conclusion

The ideal storage solution for a telescope may vary depending on the specific model and environmental factors present in your location. While leaving a telescope outside might seem convenient for short-term usage, it’s crucial to weigh the long-term consequences on your instrument’s performance and longevity. With proper care and adequate storage measures, your telescope will continue to serve as your window to the cosmos for years to come

FAQs

Q: How do I protect my telescope from dust or debris while outdoors?

A: Use lens caps while the telescope is not in use and avoid setting it up near environments prone to fine particles or splashing water.

Q: What’s the ideal indoor location for telescope storage?

A: Ideally, you should store your telescope in a controlled environment, such as a room with consistent temperature and humidity levels. Avoid direct sunlight, and keep it away from heating or cooling vents.

Q: How long can I safely leave my telescope covered outdoors?

A: The duration varies depending on your location’s climate and weather conditions. Regularly monitor the local forecast and promptly bring your telescope indoors if harsh conditions are expected.